Author Archives: Boone Gorges

Lessons from the Google Summer of Code Mentor Summit

A few quick thoughts about the Google Summer of Code Mentor Summit, which I attended last weekend.

Google Summer of Code is a program, run by Google, which encourages open source development by paying college students to undertake summer coding projects with various open source projects. I co-mentored two projects for WordPress, and was one of the lucky few from among WP’s fifteenish mentors to get a trip to the Googleplex in Mountain View.

The Summit was organized as an unconference. On Saturday, attendees proposed session topics on a big scheduling board, and indicated their interest in other suggested sessions with stickers. This being a supremely geeky conference, I didn’t understand about half of the session titles.

A few takeaways, in no particular order:

  • Process matters. A lot. Probably 2/3 of the sessions I attended were devoted to project workflow: version control, code review, various kinds of testing. Probably some of the focus on process is due to the fact that it constitutes common ground between even those individuals whose software projects are quite different from each other. But I think it also speaks to the importance of workflow that really works, especially in the decidedly non-top-down world of open-source development communities.
  • WordPress seems pretty far behind the curve in terms of development infrastructure. Take version control: WordPress is the only project I heard about all weekend that still uses (or is not in the process of moving away from) centralized version control like Subversion. Git seemed like the most popular platform (there was a whole session on migrating massive project repos from SVN to Git, which was probably my favorite session of the weekend). I came away with lots of ideas for how the WP and BuddyPress development processes might be improved (and, more importantly, why it might be worthwhile to pursue these ideas), which I’ll be working on in the upcoming weeks and months.
  • More generally, I came away realizing that WordPress devs (and probably other kinds of devs, but this is what I know!) have a lot to learn from the way that similar software development projects are run. I was part of some extremely interesting conversations with core developers from Drupal and TYPO3 and was really, really impressed with the way the way that their development workflow informs and enables better software. Some WordPress fans have a tendency (sometimes joking, sometimes not) to disparage other projects like this, an attitude that can prevent us from learning a lot from each other. That’s a real shame, and it’s something I’d like to rail against.

I met some great people and learned a lot at the Summit. Many thanks to Google for footing the bill, to WordPress for selecting me to go, and to Stas and Francesco for their cool GSoC projects!

Joining the BuddyPress commit team

This weekend at WordCamp NYC, John James Jacoby announced that I, along with Paul Gibbs, have been promoted to core committers on the BuddyPress project. Needless to say, I’m honored and extremely excited.

For my academic friends who might not know what this means, here’s a (very brief) description of open-source development model used by WordPress (and, by extension, BuddyPress). Anyone who downloads the BuddyPress software can view and modify the source code at will. Likewise, anyone can report bugs, suggest enhancements, or file actual patches (small bits of code that, when added to the distribution version of the software, fix bugs or add features) on the BuddyPress bug tracker, which is the communication hub for the developers who work on the software. However, only a small handful of individuals can “commit” to the “core”. In other words, while anyone can submit code for consideration, only core committers can add those patches to the version of the software that is distributed via wordpress.org. Being added as a committer means that the existing committers (Andy, John, and Marshall) trust and respect my work enough to, in effect, hand me the keys to the car.

It’s a very cool thing for me because I don’t have any formal background in programming or in software. Before roughly the spring of 2009, I had only a smattering of programming knowledge, and had never cracked the hood of WordPress or of BuddyPress. My work on the CUNY Academic Commons plunged me deep into the world of WordPress development. I found a natural home in the BuddyPress community, which is full of smart people thinking not just about how software works, but also about how it can enhance the ways we engage with each other online. I’m certain that I wouldn’t have been promoted to this position if I hadn’t been willing (and encouraged) to share, whether it be the free time I’ve spent writing patches for BuddyPress, helping others out on the forums, or writing code that is freely available (and supported with a smile!). It’s a testament to the fact that the extra effort it sometimes takes to share and to do one’s work in the open can come back to you many times over.

I’m looking forward to the next stages of BuddyPress development!

New BuddyPress plugin: BP Lotsa Feeds

I’ve been working on a project recently with Kevin Prentiss and the other fine folks at Red Rover. Kevin is a big believer in the power of feeds, and I’m a big believer in the power of BuddyPress’s activity component, and together we realized that BuddyPress’s RSS support for its rich activity content is a bit lacking.

This new plugin, BP Lotsa Feeds, is meant to address the issue. It activates RSS feeds for just about everything in BuddyPress, from an individual member’s sitewide comments, to new group memberships for specific groups, to individual forum topics.

Read more about the plugin on its home page, and follow its development on Github. Thanks to Red Rover for sponsoring a cool plugin.

Fake Retweets

Twitter communities are built on trust – sometimes too much trust. Recent XSS and XSRF exploits on Twitter have shown that the Twitter platform has been designed in a way that accidentally allows such trust to be used for evil purposes. My Fake Retweets experiment suggests that not all Twitter exploits are platform-level, architectural problems.

First things first: The real point of fake retweets is that they’re funny. What better way to make fun of your friends (or enemies) than to pretend to retweet stupid things that they allegedly said? I am not a performance artist, online or off.

Yet fake retweets do seem to say something worth saying about the medium. FRTs only work as a vehicle for jokes because there is a general assumption that all retweets are genuine. To some extent, this has nothing to do with Twitter. The only reason why jokes (or lies, or metaphors, or irony) work at all is because there exists a contrary convention that the jokester (liar, ironist) consciously flouts. In a world where people only tell lies, lies do not work in the same way that lies work in our world. I might lie about my dog eating my homework so that the teacher will give me an extension; but if there is no presumption in favor of truth, teachers will have no reason to grant an extension based on such a claim. (Echoes of Kant.) Jokes seem to work in a similar way: if we all spoke in puns all the time, for instance, then the utterance of a pun would have no element of surprise, robbing the joke of much of its value.

Thus the efficacy of fake retweets is at least in part an instance of a broader phenomenon. Anecdotally, though, it seems like Twitter is a particularly fertile yet underutilized environment for this kind of convention-flouting. With limited exceptions, people on Twitter generally seem to believe that everyone else is being genuine. There are some counterexamples, like Mark Sample‘s #MarksDH2010 or accounts like FakeAPStylebook. But both are either so absurd that no one could possibly think that they weren’t fake, or actively wear their fakeness on their sleeves with hashtags, or both. (This fact doesn’t necessarily take away from the funniness of the jokes in question. It just means that they don’t have the intent to deceive.) Aside from these sorts of extravagant Twitter charades, it’s hard to think of examples (from personal experience) where real live lying takes place on Twitter.

That’s not to say that my Fake Retweets were meant to deceive. (But they did. In one instance, a follower who commented on the fakeness of one retweet took another one as serious just a few minutes later.) The spirit of Fake Retweets in this case is to poke fun at friends, which means that my FRTs were mainly friendly and totally directed at friends. Yet I have to admit a little trepidation to the FRT, even with such benign content. There’s something about faking another person’s voice (perhaps especially in a community of academics) that seems to cross a sacred line.

The sense of violation in FRTs, it seems, is related to the fact that we all spend so much effort cultivating a specific persona via Twitter. Yet again, such cultivation is not a Twitter-specific phenomenon – surely there’s a sense in which personae are necessarily self-constructed – but it seems to be especially evident on Twitter. Maybe it’s because on Twitter, you control your own stream. In real life, all my eloquence and fashion won’t prevent the occasional piece of food in my teeth; in meatspace, there are infinite vectors for our self-constructed selves to get out of hand. Twitter, in contrast, has very few dimensions for self-presentation to run amok: tweets are finite in length and in number, you get to choose your avatar, you can spend hours crafting your 140-character pearls, you can even edit and delete mistaken tweets. The FRT threatens to cleave this controlled space, to taint our carefully manicured self-images.

The aspects of Twitter that make FRTs so uncomfortable aren’t necessarily bad things. Maybe the world would be a better place if it were as trusting as the Twitter community. (Though I wouldn’t want to be vulnerable to cross-site scripting in real life.) But certainly there is room for a little more skepticism when you see something come across your screen. Think before you click that link, before you believe that RT.

Using Github with wordpress.org plugin SVN

Like this tutorial? Check out my updated and more comprehensive Git/Github/wordpress.org tutorial at https://teleogistic.net/2011/05/revisiting-git-github-and-the-wordpress-org-plugin-repository/.

I’m on a never-ending quest to come up with a good local environment that will support the kind of WordPress plugin development that I enjoy So Very Much. I’ve only just recently begun using Github for version control and already I can’t imagine living without it. But doing WP plugin development in Github is not totally straightforward, because wordpress.org’s plugin repository uses SVN. When it comes time to release a new version on the wordpress.org repo, it’s simply not practical to merge changes manually and manage two different version histories. I wanted a setup where I could use Github for everyday development, but would connect to WP SVN when I was ready to release.

There are lots of posts out there on how to use git-svn:

I couldn’t get any of the methods to work the way I wanted. But by mashing a few of them together, I have what is, I think, a workable setup. Here are the steps.

  1. If you don’t already have one, create a Github repository for your work. I’ll assume here that you have configured Git on your machine, with git-svn installed as well.
  2. Create a directory for your working copy. I use several local WP installations for plugin development, the main one of which is named Doris. So I’d do the following, for an imaginary plugin I’ll call awesome-plugin:
    [bash]
    cd /sites/doris/wp-content/plugins
    mkdir awesome-plugin
    [/bash]
  3. Before connecting to WP SVN, it’s a good idea to check for the revision number of your most recent commit. If you don’t, git-svn will sift through all 280,000+ revisions on svn.wp-plugins.org.
    [bash]
    svn log http://svn.wp-plugins.org/awesome-plugin
    [/bash]
    Scroll to find the most recent reversion number. Let’s say that in this case it’s r287228.
  4. Clone the svn repository to your newly created directory. Because I want this working copy to actually work as a WordPress plugin, I’m not going to check out the entire awesome-plugin tree. Instead, I’ll just get the trunk, and when I want to tag new versions of the plugin, I’ll do it in a separate working copy on my machine. (This is perhaps not the ideal way to work, but for me it works – probably irrationally, I like having “clean” instances of the trees somewhere on my machine that are used only for tagging new versions.)
    [bash]
    git svn clone http://svn.wp-plugins.org/awesome-plugin/trunk awesome-plugin -r287228
    [/bash]
    git svn clone will create the git-svn link and then do the initial fetch into the awesome-plugin directory.
  5. Depending on how you’re planning to use Git, you might want to create a branch that tracks the svn trunk, just for stable svn releases:
    [bash]
    cd awesome-plugin
    git checkout -b svn remotes/git-svn
    [/bash]
  6. Now that we’ve connected Git to WP SVN, we can connect to Github:
    [bash]
    git remote add -f origin git@github.com:boonebgorges/awesome-plugin.git
    [/bash]
    I’m calling Github ‘origin’ because I’m so used to push and pulling to and from ‘origin’, but you can call it whatever you want. Of course, make sure to change ‘boonebgorges/awesome-plugin.git’ to reflect your username and repo name.
  7. Let’s test the connections. If your Github repo is empty, you can push stuff up right away:
    [bash]
    git push origin svn
    [/bash]
    Remember that I am working on a branch called ‘svn’; you might use ‘master’ or something else altogether if you’d prefer. If your Github repo already had some files in it, you might find that you have to pull and merge them before pushing. Now make a change to your local:
    [bash]
    touch test.txt
    nano test.txt # Type something in the document and save it
    git add .
    git commit -m "testing git-svn"
    git push origin svn
    [/bash]
  8. Finally, let’s test to make sure that we can commit to SVN.
    [bash]
    git svn dcommit
    [/bash]
    The first time you try this, you will be prompted for your wordpress.org password. If your local username is not the same as your wordpress.org username (mine isn’t), just hit enter and SVN will ask for your full creds. You should get a “Committing to…” message, followed by “Committed r123456” or something along those lines. You can check to see that your commit has gone through by visiting http://svn.wp-plugins.org/awesome-plugin/trunk in your browser.

Good luck!

New WordPress plugin: Simple Import Users

My palz Mikhail and Luke over at Blogs@Baruch needed an easier way to add users to sites in the WordPress network. They’d been using DDImportUsers, which worked, but was finicky: DDIU required you to specify too much information, its formatting was tough for instructors to understand, and, most importantly, it didn’t deal well with existing accounts, which it simply ignored instead of adding as new users to the site in question. So they asked me to modify the plugin for their purposes.

The result is a near-complete rewrite, released today under the name Simple Import Users. Instead of entering all sorts of information about username, password, display names, etc, Simple Import Users accepts only a single argument: email address. That makes it simple enough for anyone to use. Insert a list of email addresses into Simple Import Users, and it checks each email address in the following way:

  • If a WP user is *not* found with the email address in question, SIU creates a new user with that address. The username is automatically generated from the part of the email address before the @-sign, which means that this plugin will probably work best for those setups where you can guarantee unique email prefixes (like schools). Passwords are randomly generated.
  • Then the new user (or the existing user, if one was found) is added to the blog.
  • The user is then sent a customized welcome email. All users get a message saying that they’ve been added to the blog, with information on how to access the dashboard. In the case of new users, it contains their login info as well.
  • If you’re running BuddyPress, the email to new users also contains a message encouraging users to fill out their BP profiles, with a link to the Edit Profile page.

The plugin has no settings, and is intended for this very specific purpose. But if you’ve got a setup like Blogs@Baruch, it could save you a lot of time and effort.

Get the Simple Import Users here.

Enabling Popularity Contest for WordPress networkwide use

Alex King’s Popularity Contest is a pretty cool way to collect data about which posts on a WordPress site the most popular. The data collected is more sophisticated and customizable than simple analytics, because it distinguishes between page views and things like trackbacks, comments, and other kinds of hits. The plugin supports WordPress Multisite in the sense that it’s possible to activate network-wide; when you do so, the plugin keeps site-specific popularity stats. But what if you want popularity rankings across your entire network?

I recently modified Popularity Contest to do just that. The idea is simple: in order to keep network-wide stats, we need a network-wide table (instead of the default site-specific tables). How do you keep information about all networkwide posts on a single blog? I used Donncha O Caoimh’s Sitewide Tags as a bridge. All posts across the network are copied to the tags blog, and popularity data is indexed on the tags blog.

To make this work, several things are needed. I can’t just give you the files because I’ve altered them in other, irrelevant ways, but I will walk you through the process of setting it up. Also, keep in mind that we’ll be modifying the plugin code for both Popularity Contest and Sitewide Tags, modifications you’ll have to make each time you upgrade the plugins. Make sure you back up your work.

  1. Install Sitewide Tags which can be downloaded from its website. You have to activate a few things in order to turn it on – read the readme carefully. Be sure to take note of the tags blog id number, as we’ll need that in a later step.
  2. In sitewide-tags.php, look for the function sitewide_tags_post(). Near the end of the function is a line that says restore_current_blog();. Immediately after that line, enter the following code:
    [code language=”php”]update_post_meta( $post->ID, ‘tags_post_id’, $p );[/code]
    That line makes sure that every time a post is aggregated on the tags blog, the original post gets a piece of metadata noting the post id of the corresponding tags blog post. We’ll use that information in a later step.
  3. Download Popularity Contest from its website. I don’t recommend that you activate it yet, especially not networkwide, because it will create a lot of tables that you don’t really need.
  4. The next few steps will require mading some modifications in the main Popularity Contest plugin file, popularity-contest.php. The first modification is to change all references to $wpdb->posts (which, when activated networkwide, will refer to the posts table for the individual blogs) and change them to point to the tags blog post table. A search and replace that replaces $wpdb->posts with wp_posts (or wp_x_posts, if your tags blog is not site number 1 but is instead site x.
  5. The next modification involves the function akpc_init(), near the end of the plugin file. That’s where the table names for the Popularity Contest custom tables are found. We need to make sure that they point to the tags blog. Replace the existing function with this:
    [code language=”php”]
    function akpc_init() {
    global $wpdb, $akpc;

    $wpdb->ak_popularity = ‘wp_ak_popularity’;
    $wpdb->ak_popularity_options = ‘wp_ak_popularity_options’;

    $akpc = new ak_popularity_contest;
    $akpc->get_settings();
    }
    [/code]
    If your tags blog is something other than blog 1, you could change these table names to match (e.g. wp_15_ak_popularity) but it isn’t really necessary.

  6. Now we have to make Popularity Contest aware of the identity relationships between the tags posts and the original posts. Two snippets of code should do it in most places. First, find the function record_feedback, which starts around line 700. Right before the switch($type) line, insert the following:
    [code language=”php”]
    if ( $tags_post_id = get_post_meta( $comment_post_ID, ‘tags_post_id’, true ) )
    $comment_post_ID = $tags_post_id;
    [/code]
    Next, find the function akpc_api_record_view(), which starts around 2550. Right after array_unique($ids); (around line 2555), insert the following:
    [code language=”php”]
    $tags_ids = array();
    foreach ( $ids as $id ) {
    $tags_ids[] = get_post_meta( $id, ‘tags_post_id’, true );
    }
    $ids = $tags_ids;
    [/code]
    These two modifications make sure that Popularity Contest knows which post on the tags blog corresponds to the post being visited/commented on on the child blogs.
  7. At this point, you can activate the popularity plugin networkwide. Here’s what happens, very roughly:
    • The plugin creates the necessarily popularity tables – just one set for the whole installation.
    • When you publish a new post on any site, it gets copied to the tags blog. Our modification from step 2 makes sure that the copied post ID (let’s say 36) is saved to the original post.
    • When someone visits the original blog post, Popularity Contest fires (because it’s been activated network wide). Our modifications in steps 4 and 5 make sure that the plugin knows to record the activity to the tags blog index, and step 6 make sure that the plugin know which post the activity belongs to.
  8. You’ll need another modification to get the data out, since you’ll want to display it on your site somewhere. The default function for this is called show_top_ranked(). We need to modify so that it gets the requested data from the right place. Replace the stock function with this one:[code language=”php”]
    function show_top_ranked($limit, $before, $after) {
    switch_to_blog( 1 );
    if ($posts=$this->get_top_ranked_posts($limit)) {
    foreach ($posts as $post) {
    $ud = get_userdata( $post->post_author );
    print(
    $before. get_thumbnail( $post->post_author, 36 ) .’ID).'”>’
    .$post->post_title.’

    ‘. $ud->display_name . ‘‘ . $after
    );
    }
    }
    else {
    print($before.'(none)’.$after);
    }
    restore_current_blog();
    }
    [/code]
    Make sure you change the number in the switch_to_blog() call to the id of your tags blog.

I think I’ve remembered everything. Good luck!

Bonus!

For my project, I was moving from a single WordPress site to a multisite situation. The popularity plugin had been running on both setups for a while, so the data was totally messed up and needed to be combined (which meant finding the corresponding post data and adding it together – yeesh!). Here’s the script I used – be careful with it, and keep in mind that it was designed for a *very* specific use. Do not use this code if you don’t understand exactly what every line does!

[code language=”php”]
global $wpdb;

$query = “SELECT * FROM {$wpdb->blogs} WHERE site_id = ‘{$wpdb->siteid}’ “;
$blog_list = $wpdb->get_results( $query, ARRAY_A );

foreach( $blog_list as $blog ) {
//print_r($blog); continue;
if ( $blog[‘blog_id’] == 1 ) continue;
//if ( $blog[‘blog_id’] != 83 ) continue;

$tn = ‘wp_’ . $blog[‘blog_id’] . ‘_posts’;
$tnmeta = ‘wp_’ . $blog[‘blog_id’] . ‘_postmeta’;

$query = “SELECT ID FROM {$tn} WHERE post_type = ‘post’ AND post_status = ‘publish’ “;
$posts = $wpdb->get_results( $query, ARRAY_A );

foreach( $posts as $post ) {
$id = $post[‘ID’];

$query = “SELECT meta_value FROM {$tnmeta} WHERE post_id = ‘{$id}’ AND meta_key = ‘tags_post_id’ “;
$tags_post_id = $wpdb->get_results( $query, ARRAY_A );
$tpid = $tags_post_id[0][‘meta_value’];

$query = “SELECT * FROM wp_ak_popularity WHERE post_id = ‘{$id}'”;
$old_data = $wpdb->get_results( $query, ARRAY_A );
$old_data = $old_data[0];

$query = “SELECT * FROM wp_ak_popularity WHERE post_id = ‘{$tpid}'”;
$new_data = $wpdb->get_results( $query, ARRAY_A );
$new_data = $new_data[0];

if ( $old_data && $new_data ) {
$combined_data = array();

$combined_data[‘post_id’] = $new_data[‘post_id’];
$combined_data[‘last_modified’] = $new_data[‘last_modified’];

foreach( $old_data as $key => $d ) {
if ( $key == ‘post_id’ || $key == ‘last_modified’ )
continue;

$combined_data[$key] = (int)$d + (int)$new_data[$key];
}
}

$query = ‘UPDATE wp_ak_popularity SET ‘;
foreach( $combined_data as $key => $cd ) {
if ( $key == ‘post_id’ )
continue;
$query .= “{$key} = ‘{$cd}’, “;
}

$query = substr_replace( $query, ”, -2 );
$query .= ‘ ‘;

$query .= “WHERE post_id = ‘{$combined_data[‘post_id’]}'”;
$wpdb->query( $query );
print_r( $old_data ); echo “
“; print_r($new_data); echo “
“; print_r($combined_data); echo “
“; echo $query; echo “

“;

}

echo “

";
//		print_r($posts);
echo "

“;
}
[/code]

Anthologize 0.4-alpha is released

The Anthologize team has been hard at work over the last week, fixing bugs behind some of the most commonly reported problems, and adding features to make Anthologizing easier and more fun. We’ve just tagged version 0.4-alpha in the WordPress repository. Visit your WordPress Dashboard’s Plugins page to upgrade.

Read more about the changes in 0.4-alpha.

Questions or thoughts about Anthologize? Visit the Anthologize home page or the Anthologize users group.

Hiding WordPress custom post type menu items without disabling edit access

WordPress 3.0’s custom post types are really cool, opening up a whole new world of use cases for WordPress. We used custom post types extensively when developing Anthologize. But there are still some rough spots.

For instance, the ‘show_ui’ parameter of register_post_type() is a little bit too coarse-grained for our purposes. For Anthologize, we wanted to allow the user to edit custom post types with the standard Edit page, but we didn’t want users to be able to access most of these post types through the menu items automatically created by register_post_types (all links to the edit pages would appear on our custom Dashboard panel, in order to reduce redundancy and confusion). With ‘show_ui’ set to true, users could access the edit screens, but they could also access the unwanted menu items; with ‘show_ui’ set to false, the menu items were hidden, but navigating to the Edit pages (directly, via URL) threw a “You don’t have permission to access this page” error.

Here’s how we resolved the dilemma. Note that it’s a bit hackish at the moment. In the future, I hope the WordPress team will split ‘show_ui’ gets into multiple, separate arguments.

  1. In your register_post_type() call, set ‘show_ui’ to true. Here’s an example from Anthologize:
    [code language=”php”]
    register_post_type( ‘library_items’, array(
    ‘label’ => __(‘Library Items’, ‘anthologize’ ),
    ‘public’ => true,
    ‘_builtin’ => false,
    ‘show_ui’ => true,
    ‘capability_type’ => ‘page’,
    ‘hierarchical’ => true,
    ‘supports’ => array(‘title’, ‘editor’, ‘revisions’),
    ‘rewrite’ => array(“slug” => “library_item”)
    ));
    [/code]
  2. To remove the unwanted menu items, we’ll take advantage of the fact that WordPress has built-in support for custom menu order. First, we have to tell WordPress to expect a custom menu order. (The following two functions are modified from Anthologize, where they’re methods on a loader class.)
    [code language=”php”]
    function toggle_custom_menu_order(){
    return true;
    }
    add_filter( ‘custom_menu_order’, ‘toggle_custom_menu_order’ );
    [/code]
  3. Once custom_menu_order has been set to true (step 2), WordPress makes a new filter hook available, menu_order. As the name says, it’s really meant to reorder menu items, but we’ll use it to erase menu items altogether.
    [code language=”php”]
    function remove_those_menu_items( $menu_order ){
    global $menu;

    foreach ( $menu as $mkey => $m ) {
    $key = array_search( ‘edit.php?post_type=library_items’, $m );

    if ( $key )
    unset( $menu[$mkey] );
    }

    return $menu_order;
    }
    add_filter( ‘menu_order’, ‘remove_those_menu_items’ ) );
    [/code]

    Here’s what’s happening. The filter hook is meant to modify $menu_order. That’s why remove_those_menu_item() takes $menu_order as an argument, and returns it back to WordPress untouched on the last line of the function. On the first line of the function, we’re taking advantage of the fact that the $menu variable – where menu items are stored for construction into markup later on – is in the global scope. Once we’ve declared that we’ll be using $menu on the first line, we loop through each of the menu items, and when we find one that matches our custom post type (ie, when we find one that contains the string ‘edit.php?post_type=library_items’ – you’ll have to replace the post_type with your own, obviously), it gets removed from the $menu global.

You can iterate this for as many different custom post types as you’d like – just add more potential keys to the foreach loop in remove_those_menu_items(), eg
[code language=”php”]
$key = array_search( ‘edit.php?post_type=library_items’, $m );
$keyb = array_search( ‘edit.php?post_type=some_other_post_type’, $m );

if ( $key || $keyb )
unset( $menu[$mkey] );
[/code]

Introducing Anthologize, a new WordPress plugin

The moment has arrived!

Anthologize

Anthologize

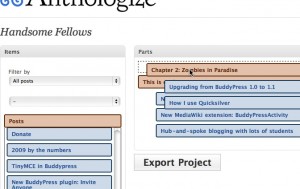
The product of One Week | One Tool, a one week digital humanities tool barn raising hosted by CHNM and sponsored by the NEH Office of Digital Humanities, is Anthologize. Anthologize is a WordPress plugin that lets you collect and curate content, organize and edit it into a form that works for you, and publish it in one of a number of ebook formats.

As I said in my last post, I was the lead developer for Anthologize. This stemmed from the fact that, for reasons of market penetration and ease of use, we’d chosen WordPress as a platform, and I was “the WordPress guy”. As such, I was the natural person to oversee the various parts of the development process, and to make sure that they fit together in a neat WordPress plugin package. It was an incredible and humbling experience to work with a group of developers who were, to a person, more talented and experienced than I am.

Anthologize PDF output

Anthologize PDF output

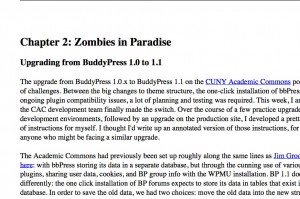
Today, the plugin is shipping with four different formats for exporting: PDF, ePub, RTF, and a modified version of TEI that leaves most content in HTML form. None of these export processes are perfect. Some require that certain libraries be installed on your server; some do not offer the kind of layout flexibility that we like; some are not great at text encoding; etc. This release is truly an alpha, a proof-of-concept. The goal is to show not only what a group of devoted individuals can conceive and develop in six short days, but also to provide the framework for further development in the world of independent authorship, publishing, and distribution.

As such, the plugin is designed, and will continue to be developed, with an eye toward maximum flexibility and modularity. Content can be created in WordPress or pulled in by RSS feeds, providing for greater choice of authoring platform. Export formats are generated by translators that work not with native WordPress data, but with an intermediary layer structured with TEI metadata markup. That means that you don’t have to know anything about WordPress to build a new export translator for yourself – you only have to know some PHP and XSLT. And we’re working on expanding Anthologize’s action and filter hooks to allow for true pluggability in the manner of WordPress itself.

I’m hoping that Anthologize will be a useful tool that draws development interest from folks who might not otherwise be interested in WordPress or web development, especially those who are working in the academic, cultural heritage, and digital humanities worlds. Get involved by checking out our Github repository at http://github.com/chnm/anthologize, our development list at http://groups.google.com/group/anthologize-dev, or stop in and chat with the dev team at #oneweek or #anthologize-dev on freenode.