Tag Archives: plugin

Group Announcements tab in BuddyPress

Cross-posted at the CUNY Academic Commons Development blog

I had a request or two to explain how I built the Group Announcements feature on the CUNY Academic Commons. Here goes.

Brief background: When the Commons was upgraded to BuddyPress 1.2, we got the benefit of interactive activity streams everywhere, including groups. This caused some confusion, however, as users were uncertain where conversation best fit into the Commons’s architecture: in the Forums (where it had been traditionally), or in the activity stream. In some communities this kind of fracturing might be okay or even welcome, but in ours it was confusing. At the same time, we wanted a way for group admins and mods to send important notices to the members of their groups. By taking the group activity updates and repurposing it as a Group Announcements section, I was able to kill two birds with one stone: providing an announcement space for mods, while focusing extended discussion in the forums.

You can download the CAC Group Announcements plugin here.

I’m not putting this in the repo at the moment because I don’t want to build a proper admin UI and support it 🙂 For that reason, here is a primer on how the plugin works – if you want to customize or maintain it, you’re on your own, buster.

  1. The CAC_Group_Announcements class is an instance of the BuddyPress Group Extension API. It is responsible for creating the Announcements tab markup and adding it to the nav. You’ll notice that the majority of the markup is created by including bp-default’s activity-loop.php and post-form.php templates. You could customize this more if you wanted.
  2. bp_is_group_announcements() is a little template tag that can be used to test whether you’re looking at a group announcements page. This is needed for the activity filter, in step 3.
  3. cac_set_announcement_filter() adds a filter to the bp_has_activities query string when you are looking at an announcements page, so that it only displays activity items of the type activity_update. In other words, when you are looking at the regular activity stream for the group, you see all of the associated group activity items (new members, forum posts, etc) but when you’re on the announcements page you only see activity updates (which, remember, have been repurposed as announcements).

As I look at the code, I see that there are things I would definitely change if I were going to make this into a distributed plugin. If you want to make those changes, be my guest. You’re welcome to help each other in the comment section, but I won’t be formally supporting this, as it is a very basic hack that should happen at the theme level anyway. Good luck!

Extending Anthologize: Part 2

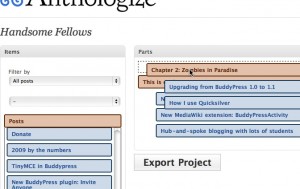
In my last post, I gave a brief overview of what happens when you click the Export Project button in Anthologize, with an eye toward demonstrating the role that third party plugins (written by people Just Like You!) can play in extending the software. In this post, I’ll flesh out some of those details.

Step 1: Anthologize, meet my format

Anthologize has what I like to think of as two internal APIs: the WordPress-facing API, and the theming API. The first step is to let Anthologize know that your format exists, which you’ll do by using the key function in the WP-facing API: anthologize_register_format(). (Check out how the WPAPI functions work in the source.) You should call anthologize_register_format() in a function hooked to anthologize_init, which ensures that it won’t fire before Anthologize is ready for it. Here’s a simple example:
[code language=”php”]
function register_my_anthologize_format() {
$name = ‘example_format’;
$label = ‘My Anthologize Format’;
$loader_file = dirname(__FILE__) . ‘/base.php’;

anthologize_register_format( $name, $label, $loader_file );
}
add_action( ‘anthologize_init’, ‘register_my_anthologize_format’ );
[/code]

anthologize_register_format_option() takes three arguments. The first is the name that Anthologize will use internally as a unique key for your format. The second is the name that users will see on the Export screen radio button and elsewhere in the interface. (It’s a good idea to set a textdomain for your strings so that they can be translated – eg $label = __( 'My Anthologize Format', 'my-anthologize-plugin' );.) The third argument is the absolute server path of your main translator file, the file that will be loaded at export time.

You can read a more in-depth example, embedded in a loader class, in this bare-bones plugin that I built for testing purposes. And the definitive examples, of course, can be found in the way that Anthologize registers its native export formats (yum, we love eating our own dog food!).

What does this give you? First, it makes your format available as a format option on the second screen of the export process:


Second, it gives your format a Publishing Options page. Since we haven’t registered any options yet, we get the bare minimum, the shortcode toggle that all formats get:


Third – and this is the big thing – anthologize_register_format() tells Anthologize that, if the user has selected your format on the export screens, the TEI document containing the project data will be handed off to the translator file whose path you specified when you registered the format. That’s where the format translation itself happens.

Step 2: Gimme some options

One of the big thoughts behind the Anthologize plugin architecture is to model WordPress’s design philosophy, which is to provide relatively few options in the core product but to allow for arbitrarily extended functionality by plugins. That’s the purpose behind anthologize_register_format_option(), the second pillar of Anthologize’s WP-facing API. anthologize_register_format_option() gives a framework for plugins to register any kind of option associated with their custom format, provides all the integrated markup for presenting those options to users, and passes along the user’s choices to the Anthologize TEI document used for format translation.

Format options can also be loaded at anthologize_init, though you should be careful to load them after the format itself. I’ll do that by using an add_action priority:
[code language=”php”]
function register_my_anthologize_format_options() {
$website_name = ‘website’;
$website_label = ‘Website’;
$website_type = ‘textbox’;

anthologize_register_format_option( ‘example_format’, $website_name, $website_label, $website_type );
}
add_action( ‘anthologize_init’, ‘register_my_anthologize_format_options’, 15 );
[/code]
(Note that the first argument is the unique $name of the format I intend to associate the option with.) This registers a plain textbox with the label ‘Website’:


You can also register checkboxes, if you need a Boolean:
[code language=”php”]
$option_name = ‘include_dedication’;
$option_label = ‘Include Dedication?’;
$option_type = ‘checkbox’;

anthologize_register_format_option( ‘example_format’, $option_name, $option_label, $option_type );
[/code]


Or you can register dropdowns:
[code language=”php”]
$fontface_format_name = ‘example_format’;
$fontface_option_name = ‘font-face’;
$fontface_label = ‘Font Face’;
$fontface_type = ‘dropdown’;
$fontface_values = array(
‘courier’ => ‘Courier’,
‘georgia’ => ‘Georgia’,
‘garamond’ => ‘Garamond’
);
$fontface_default = ‘georgia’;

anthologize_register_format_option( $fontface_format_name, $fontface_option_name, $fontface_label, $fontface_type, $fontface_values, $fontface_default );
[/code]
This kind of option highlights some of the other possible arguments that anthologize_register_format_option() will take: an array of possible values, and a default selected value:


All the options you provide, and in particular the options selected by the user at export time, are handed to your main translator file at the very end of the Anthologize export process.

So that’s how you get your format and its options registered on the WordPress side of things. Stay tuned for a discussion of how translators might be built.

Are you a potential plugin developer with ideas about how this API might evolve to better suit your purposes? Hop onto the dev list.

New BuddyPress plugin: BP Group Reviews

I’m working on a project that needs to allow users to leave reviews of groups, kinda like buddypress.org does with plugins. So, with Andy’s permission, I cleaned up, packaged, and extended his code into a new plugin, BP Group Reviews. It allows users to leave a star rating and a text review of any group on your BuddyPress installation.

New BuddyPress plugin: BP Lotsa Feeds

I’ve been working on a project recently with Kevin Prentiss and the other fine folks at Red Rover. Kevin is a big believer in the power of feeds, and I’m a big believer in the power of BuddyPress’s activity component, and together we realized that BuddyPress’s RSS support for its rich activity content is a bit lacking.

This new plugin, BP Lotsa Feeds, is meant to address the issue. It activates RSS feeds for just about everything in BuddyPress, from an individual member’s sitewide comments, to new group memberships for specific groups, to individual forum topics.

Read more about the plugin on its home page, and follow its development on Github. Thanks to Red Rover for sponsoring a cool plugin.

Using Github with wordpress.org plugin SVN

Like this tutorial? Check out my updated and more comprehensive Git/Github/wordpress.org tutorial at https://teleogistic.net/2011/05/revisiting-git-github-and-the-wordpress-org-plugin-repository/.

I’m on a never-ending quest to come up with a good local environment that will support the kind of WordPress plugin development that I enjoy So Very Much. I’ve only just recently begun using Github for version control and already I can’t imagine living without it. But doing WP plugin development in Github is not totally straightforward, because wordpress.org’s plugin repository uses SVN. When it comes time to release a new version on the wordpress.org repo, it’s simply not practical to merge changes manually and manage two different version histories. I wanted a setup where I could use Github for everyday development, but would connect to WP SVN when I was ready to release.

There are lots of posts out there on how to use git-svn:

I couldn’t get any of the methods to work the way I wanted. But by mashing a few of them together, I have what is, I think, a workable setup. Here are the steps.

  1. If you don’t already have one, create a Github repository for your work. I’ll assume here that you have configured Git on your machine, with git-svn installed as well.
  2. Create a directory for your working copy. I use several local WP installations for plugin development, the main one of which is named Doris. So I’d do the following, for an imaginary plugin I’ll call awesome-plugin:
    [bash]
    cd /sites/doris/wp-content/plugins
    mkdir awesome-plugin
    [/bash]
  3. Before connecting to WP SVN, it’s a good idea to check for the revision number of your most recent commit. If you don’t, git-svn will sift through all 280,000+ revisions on svn.wp-plugins.org.
    [bash]
    svn log http://svn.wp-plugins.org/awesome-plugin
    [/bash]
    Scroll to find the most recent reversion number. Let’s say that in this case it’s r287228.
  4. Clone the svn repository to your newly created directory. Because I want this working copy to actually work as a WordPress plugin, I’m not going to check out the entire awesome-plugin tree. Instead, I’ll just get the trunk, and when I want to tag new versions of the plugin, I’ll do it in a separate working copy on my machine. (This is perhaps not the ideal way to work, but for me it works – probably irrationally, I like having “clean” instances of the trees somewhere on my machine that are used only for tagging new versions.)
    [bash]
    git svn clone http://svn.wp-plugins.org/awesome-plugin/trunk awesome-plugin -r287228
    [/bash]
    git svn clone will create the git-svn link and then do the initial fetch into the awesome-plugin directory.
  5. Depending on how you’re planning to use Git, you might want to create a branch that tracks the svn trunk, just for stable svn releases:
    [bash]
    cd awesome-plugin
    git checkout -b svn remotes/git-svn
    [/bash]
  6. Now that we’ve connected Git to WP SVN, we can connect to Github:
    [bash]
    git remote add -f origin git@github.com:boonebgorges/awesome-plugin.git
    [/bash]
    I’m calling Github ‘origin’ because I’m so used to push and pulling to and from ‘origin’, but you can call it whatever you want. Of course, make sure to change ‘boonebgorges/awesome-plugin.git’ to reflect your username and repo name.
  7. Let’s test the connections. If your Github repo is empty, you can push stuff up right away:
    [bash]
    git push origin svn
    [/bash]
    Remember that I am working on a branch called ‘svn’; you might use ‘master’ or something else altogether if you’d prefer. If your Github repo already had some files in it, you might find that you have to pull and merge them before pushing. Now make a change to your local:
    [bash]
    touch test.txt
    nano test.txt # Type something in the document and save it
    git add .
    git commit -m "testing git-svn"
    git push origin svn
    [/bash]
  8. Finally, let’s test to make sure that we can commit to SVN.
    [bash]
    git svn dcommit
    [/bash]
    The first time you try this, you will be prompted for your wordpress.org password. If your local username is not the same as your wordpress.org username (mine isn’t), just hit enter and SVN will ask for your full creds. You should get a “Committing to…” message, followed by “Committed r123456” or something along those lines. You can check to see that your commit has gone through by visiting http://svn.wp-plugins.org/awesome-plugin/trunk in your browser.

Good luck!

New WordPress plugin: Simple Import Users

My palz Mikhail and Luke over at Blogs@Baruch needed an easier way to add users to sites in the WordPress network. They’d been using DDImportUsers, which worked, but was finicky: DDIU required you to specify too much information, its formatting was tough for instructors to understand, and, most importantly, it didn’t deal well with existing accounts, which it simply ignored instead of adding as new users to the site in question. So they asked me to modify the plugin for their purposes.

The result is a near-complete rewrite, released today under the name Simple Import Users. Instead of entering all sorts of information about username, password, display names, etc, Simple Import Users accepts only a single argument: email address. That makes it simple enough for anyone to use. Insert a list of email addresses into Simple Import Users, and it checks each email address in the following way:

  • If a WP user is *not* found with the email address in question, SIU creates a new user with that address. The username is automatically generated from the part of the email address before the @-sign, which means that this plugin will probably work best for those setups where you can guarantee unique email prefixes (like schools). Passwords are randomly generated.
  • Then the new user (or the existing user, if one was found) is added to the blog.
  • The user is then sent a customized welcome email. All users get a message saying that they’ve been added to the blog, with information on how to access the dashboard. In the case of new users, it contains their login info as well.
  • If you’re running BuddyPress, the email to new users also contains a message encouraging users to fill out their BP profiles, with a link to the Edit Profile page.

The plugin has no settings, and is intended for this very specific purpose. But if you’ve got a setup like Blogs@Baruch, it could save you a lot of time and effort.

Get the Simple Import Users here.

Anthologize 0.4-alpha is released

The Anthologize team has been hard at work over the last week, fixing bugs behind some of the most commonly reported problems, and adding features to make Anthologizing easier and more fun. We’ve just tagged version 0.4-alpha in the WordPress repository. Visit your WordPress Dashboard’s Plugins page to upgrade.

Read more about the changes in 0.4-alpha.

Questions or thoughts about Anthologize? Visit the Anthologize home page or the Anthologize users group.

Introducing Anthologize, a new WordPress plugin

The moment has arrived!

Anthologize

Anthologize

The product of One Week | One Tool, a one week digital humanities tool barn raising hosted by CHNM and sponsored by the NEH Office of Digital Humanities, is Anthologize. Anthologize is a WordPress plugin that lets you collect and curate content, organize and edit it into a form that works for you, and publish it in one of a number of ebook formats.

As I said in my last post, I was the lead developer for Anthologize. This stemmed from the fact that, for reasons of market penetration and ease of use, we’d chosen WordPress as a platform, and I was “the WordPress guy”. As such, I was the natural person to oversee the various parts of the development process, and to make sure that they fit together in a neat WordPress plugin package. It was an incredible and humbling experience to work with a group of developers who were, to a person, more talented and experienced than I am.

Anthologize PDF output

Anthologize PDF output

Today, the plugin is shipping with four different formats for exporting: PDF, ePub, RTF, and a modified version of TEI that leaves most content in HTML form. None of these export processes are perfect. Some require that certain libraries be installed on your server; some do not offer the kind of layout flexibility that we like; some are not great at text encoding; etc. This release is truly an alpha, a proof-of-concept. The goal is to show not only what a group of devoted individuals can conceive and develop in six short days, but also to provide the framework for further development in the world of independent authorship, publishing, and distribution.

As such, the plugin is designed, and will continue to be developed, with an eye toward maximum flexibility and modularity. Content can be created in WordPress or pulled in by RSS feeds, providing for greater choice of authoring platform. Export formats are generated by translators that work not with native WordPress data, but with an intermediary layer structured with TEI metadata markup. That means that you don’t have to know anything about WordPress to build a new export translator for yourself – you only have to know some PHP and XSLT. And we’re working on expanding Anthologize’s action and filter hooks to allow for true pluggability in the manner of WordPress itself.

I’m hoping that Anthologize will be a useful tool that draws development interest from folks who might not otherwise be interested in WordPress or web development, especially those who are working in the academic, cultural heritage, and digital humanities worlds. Get involved by checking out our Github repository at http://github.com/chnm/anthologize, our development list at http://groups.google.com/group/anthologize-dev, or stop in and chat with the dev team at #oneweek or #anthologize-dev on freenode.

Import From Ning now imports Ning content into BuddyPress

[IMPORTANT: I am no longer supporting this plugin. You may contact me for a list of consultants who may be interested in providing Ning import support.]

Back when Ning announced that it’d be cutting off previously free accounts, I took a weekend and developed Import From Ning, a plugin that helped users pull their Ning user and profile data into a WordPress or BuddyPress installation. It was my own little BuddyPress-fanboyish way of helping all those Ningsters.

Several weeks ago, Ning released its Ning Network Archiver, which (finally) allowed network admins an easy way to take their content with them. On the heels of this release by Ning, today I am releasing version 2.0 of Import From Ning, which imports the content from a Ning Network Archive.

Read more about the updated plugin here. And to those Ningsters who are coming over to WordPress and BuddyPress: good on ya!

Making Userthemes work on WordPress 3.0

Some friends of mine (Joe Ugoretz and Jim Groom) were chatting on Twitter yesterday about how Userthemes, the WPMU/MS plugin they rely on to allow user customizations of copied system themes, had broken with WordPress 3.0. I decided to take a look at it. After digging a little, I found the immediate cause, as well as a workaround.

Please note that this workaround is very much a hack. It shouldn’t cause any security issues (see explanation below), but it will break the next time you upgrade WP.

Joe’s problem was that the plugin was only working for Super Admins. Administrators of single Sites could not copy new Userthemes, and they were redirected to the dreaded wp-admin/?c=1 when they tried to access the Edit Userthemes panel on the Dashboard. I figured it was a problem with permissions, and it was: all of those functions are triggered only for those users with the capability edit_themes, but for some reason only Super Admins, and not Administrators, were showing up as having that ability. (The weird thing – when I did a var_dump of WP Roles, I saw that Administrator *did* have edit_themes.) Maybe there’s some setting in WPMS that allows users to edit themes, but I couldn’t see it.

So the solution is to change the edit_themes check to something else. switch_themes seemed like an obvious choice to me, since anyone with the ability to switch themes on a given blog would also have had the ability to edit themes on that same blog. So there shouldn’t be a security problem – only blog admins should have the ability to make userthemes.

You’ll need to modify the plugin, as well as a few lines in the WordPress core.

  1. Back up. I’m not responsible for anything that goes wrong!
  2. Open the userthemes.php file. (I’d link to it, but I can’t find it anywhere on the web. When I’m at a better internet connection, maybe I’ll upload a version for you to edit. Maybe someone out there has a copy to share.) Search for all instances of ‘edit_themes’ and replace with ‘switch_themes’.
  3. From your WP root directory, open wp-admin/theme-editor.php. On line 12, change ‘edit_themes’ to ‘switch_themes’.
  4. From your WP root directory, open wp-admin/menu.php. On line 173, change ‘edit_themes’ to ‘switch_themes’.
  • This should restore the basic functionality of Userthemes (though Joe says that there’s still some bugginess – if you can’t access the Edit Userthemes from the main Dashboard page, try going to the Userthemes panel first). I must repeat that this is an ugly hack, and I’m hoping that someone smarter than me will step in and tell me why this is happening in the first place.