This summer, my family and I rented a lake house for a few weeks. We were excited to have a grill, and at first, we took serious advantage: burgers, chicken, kebobs, barbecue, etc. But we soon ran up against two problems: meat fatigue and a fridge full of leftovers. Between the two of us, my wife and I have a number of standby techniques for disposing of miscellaneous leftovers, but most (like frittatas and stir fry) require making the house even hotter with a hot stove.
Pizza to the rescue! We got the idea early in our trip to try making pizza on the grill. It turned out so well that we ended up doing it a number of times. Not only was it a good way to get rid of just about any grilled leftovers, but it was legitimately good pizza in its own right – even when some of the ingredients we used were kinda cheap.
Arriving at the best technique was the biggest challenge. I’ve described the process below. We had a propane grill, which was helpful for heat control, but you could do it with charcoal and it’d probably taste better.
Get a dough – We got our doughs from the local pizza joint. You could make it yourself, but it’s a pain to make pizza dough, and so cheap to buy it. I’ve bought doughs from at least a half dozen pizzerias, and I’ve never paid more than $4 for a large one. As long as it’s a non-chain joint that does reasonable business, you know the dough will be fresh, and prepared with more expertise than if you’d done it yourself. (Some grocery stores sell pizza doughs. I’ve never bought one, so I can’t vouch – but I have noticed that they’re generally pretty small. Also, you can buy premade crusts, but is lame, as it takes away the biggest advantage of the grill, namely that it gets hot enough to cook a crust properly.)
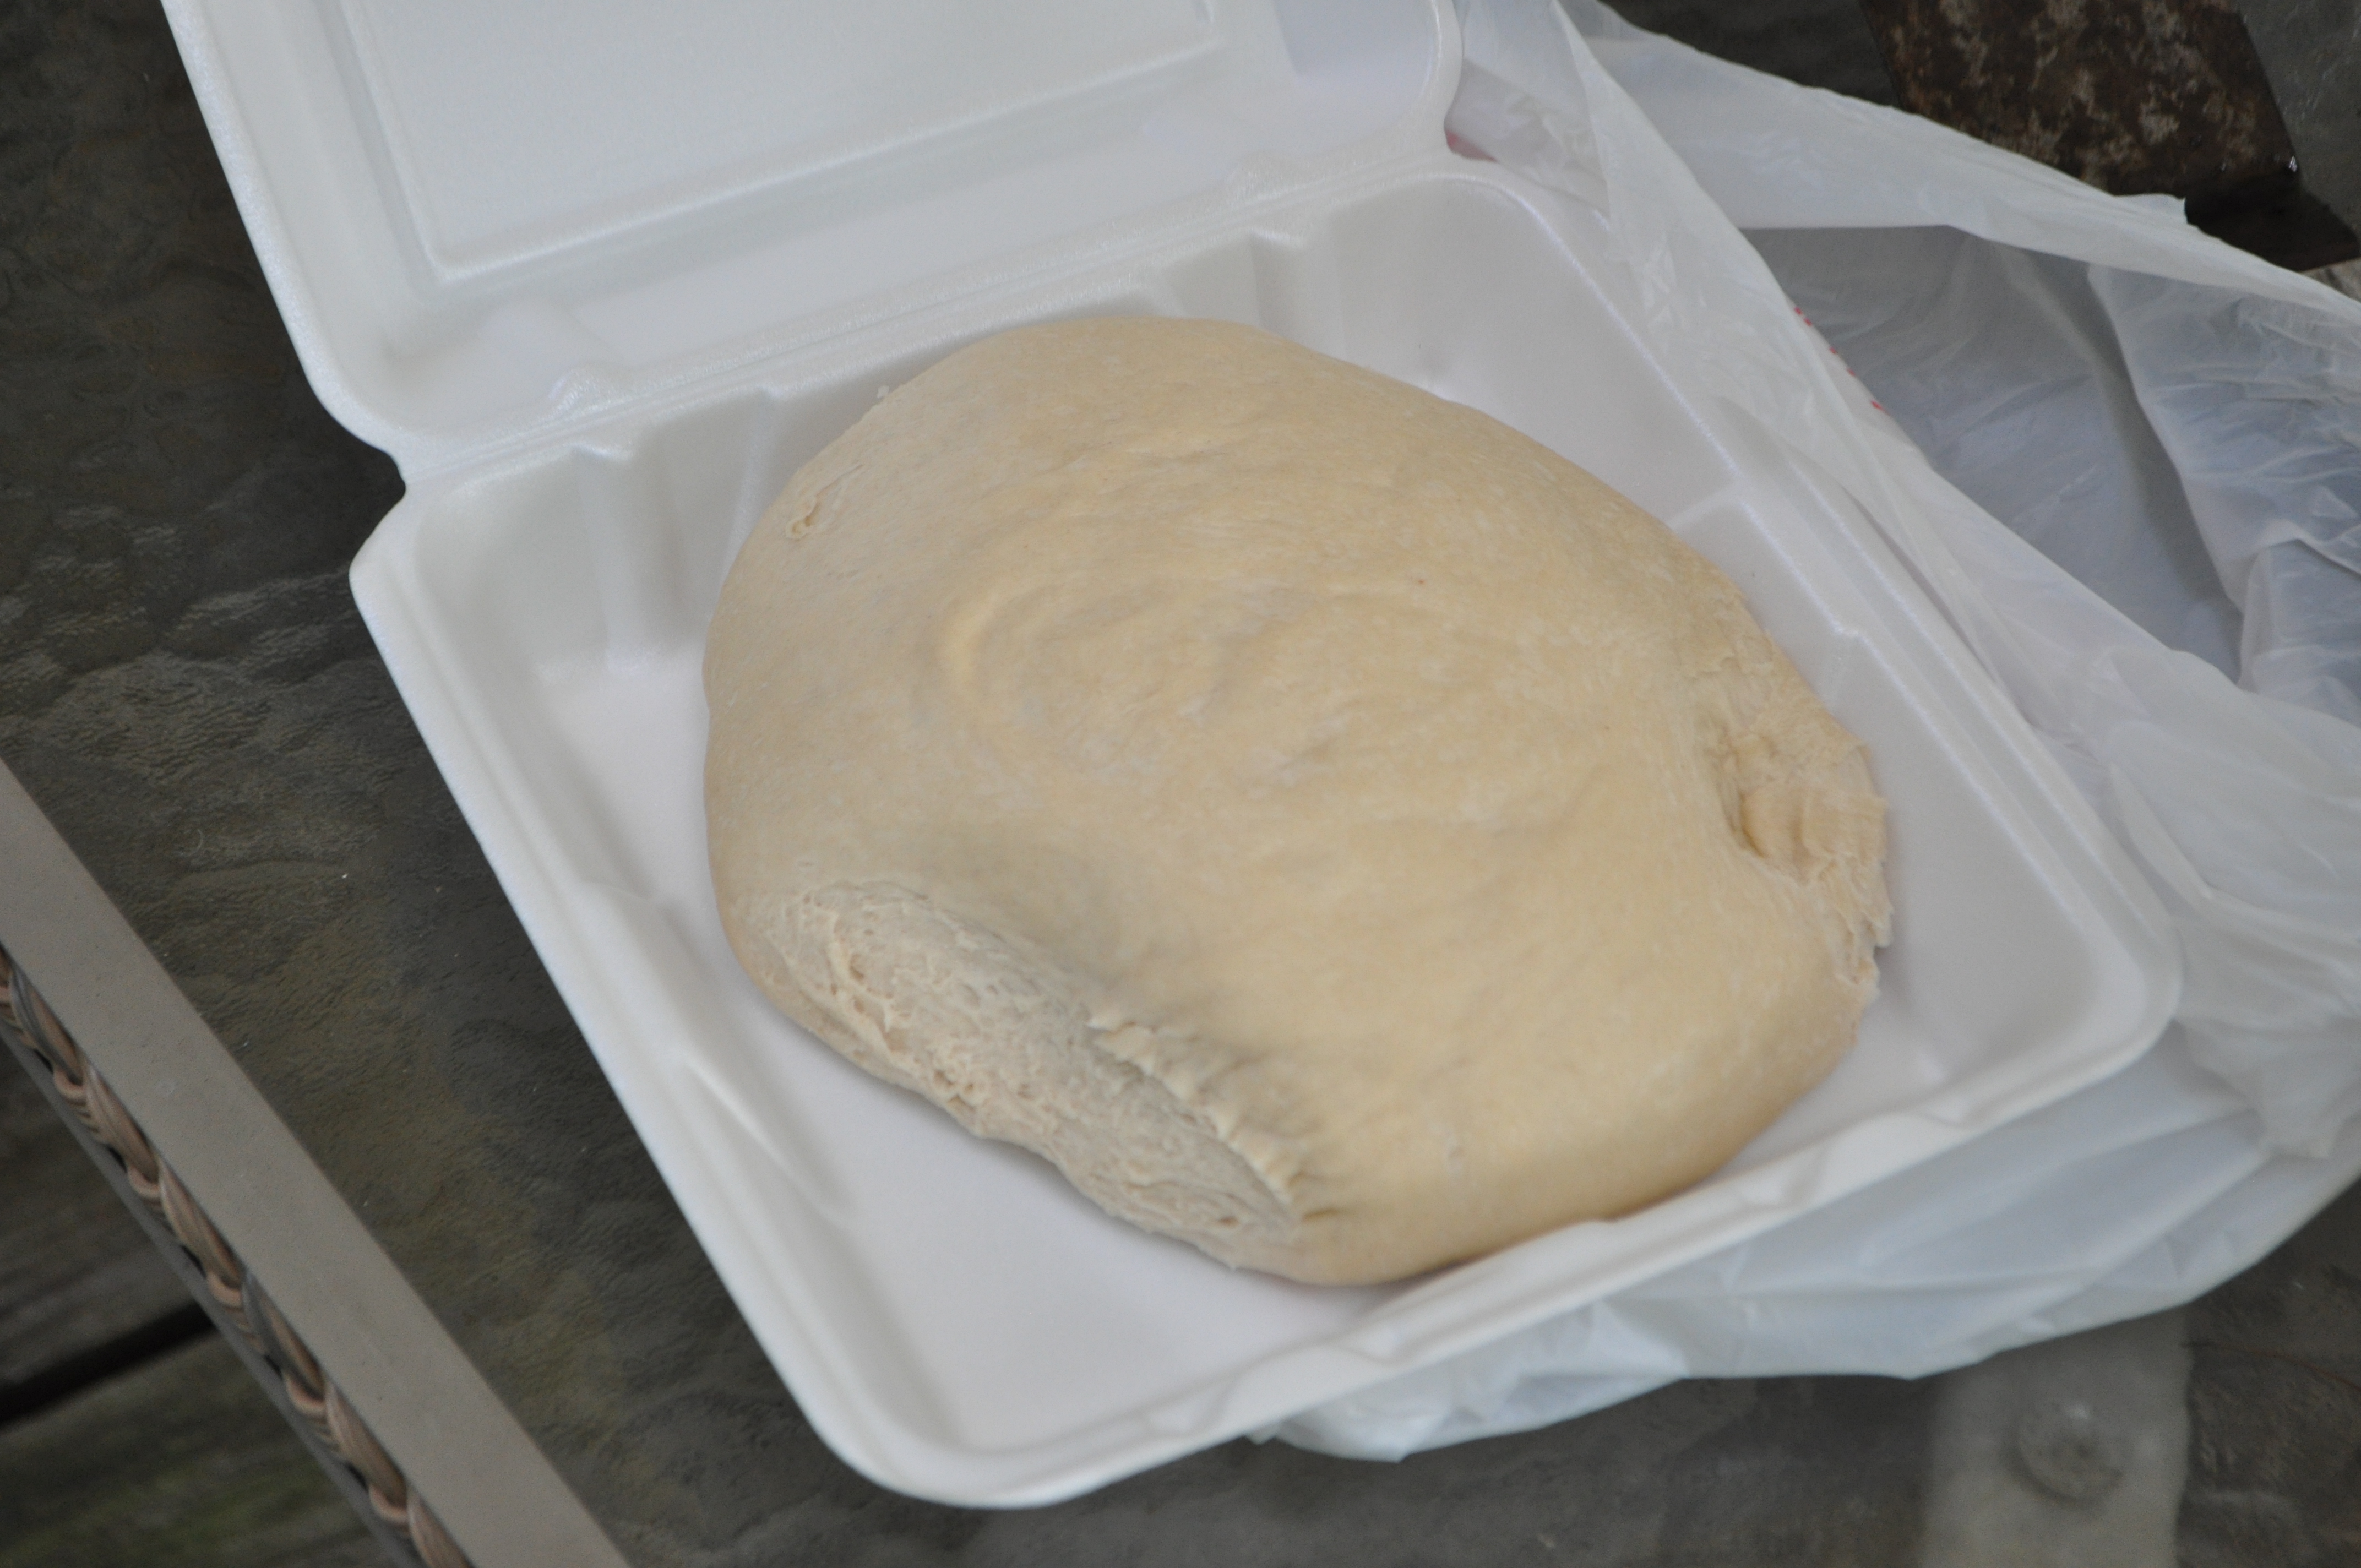
Get a large dough from a local pizzeria. Price: $2-4.
Get the rest of your ingredients – You’ll need:
- Sauce – We used cheap jarred sauce. Plain crushed tomatoes would probably be even better. Once we made a pie with leftover pulled pork, and I used a thin layer of barbecue sauce instead.
- Cheese – We had our best results with Polly-O mozzarella, either grated large or cut into very thin strips/slices. The pre-shredded stuff is a big question mark – could be fine, but could be pretty dry (that is, too dry – good pizza cheese should be a bit dried). You can use another cheese as an accent, like a bit of goat cheese.
- Toppings – Whatever you have laying around. Once we made something pretty fancy (some chi-chi salami), but usually it was whatever meat and veggies we’d grilled the day before. If it’s a bit limp after sitting in the fridge, give it a quick sauté before using. Fresh herbs are nice too.
- Oil – We used olive oil at a couple different points in the process, as described below.
Get your mise en place together – I’m typically cavalier about getting stuff in place before cooking, but with grilled pizza it’s crucial. The steps below can be fast and furious, and you won’t have time to stumble drunkenly to the fridge to get ingredients.
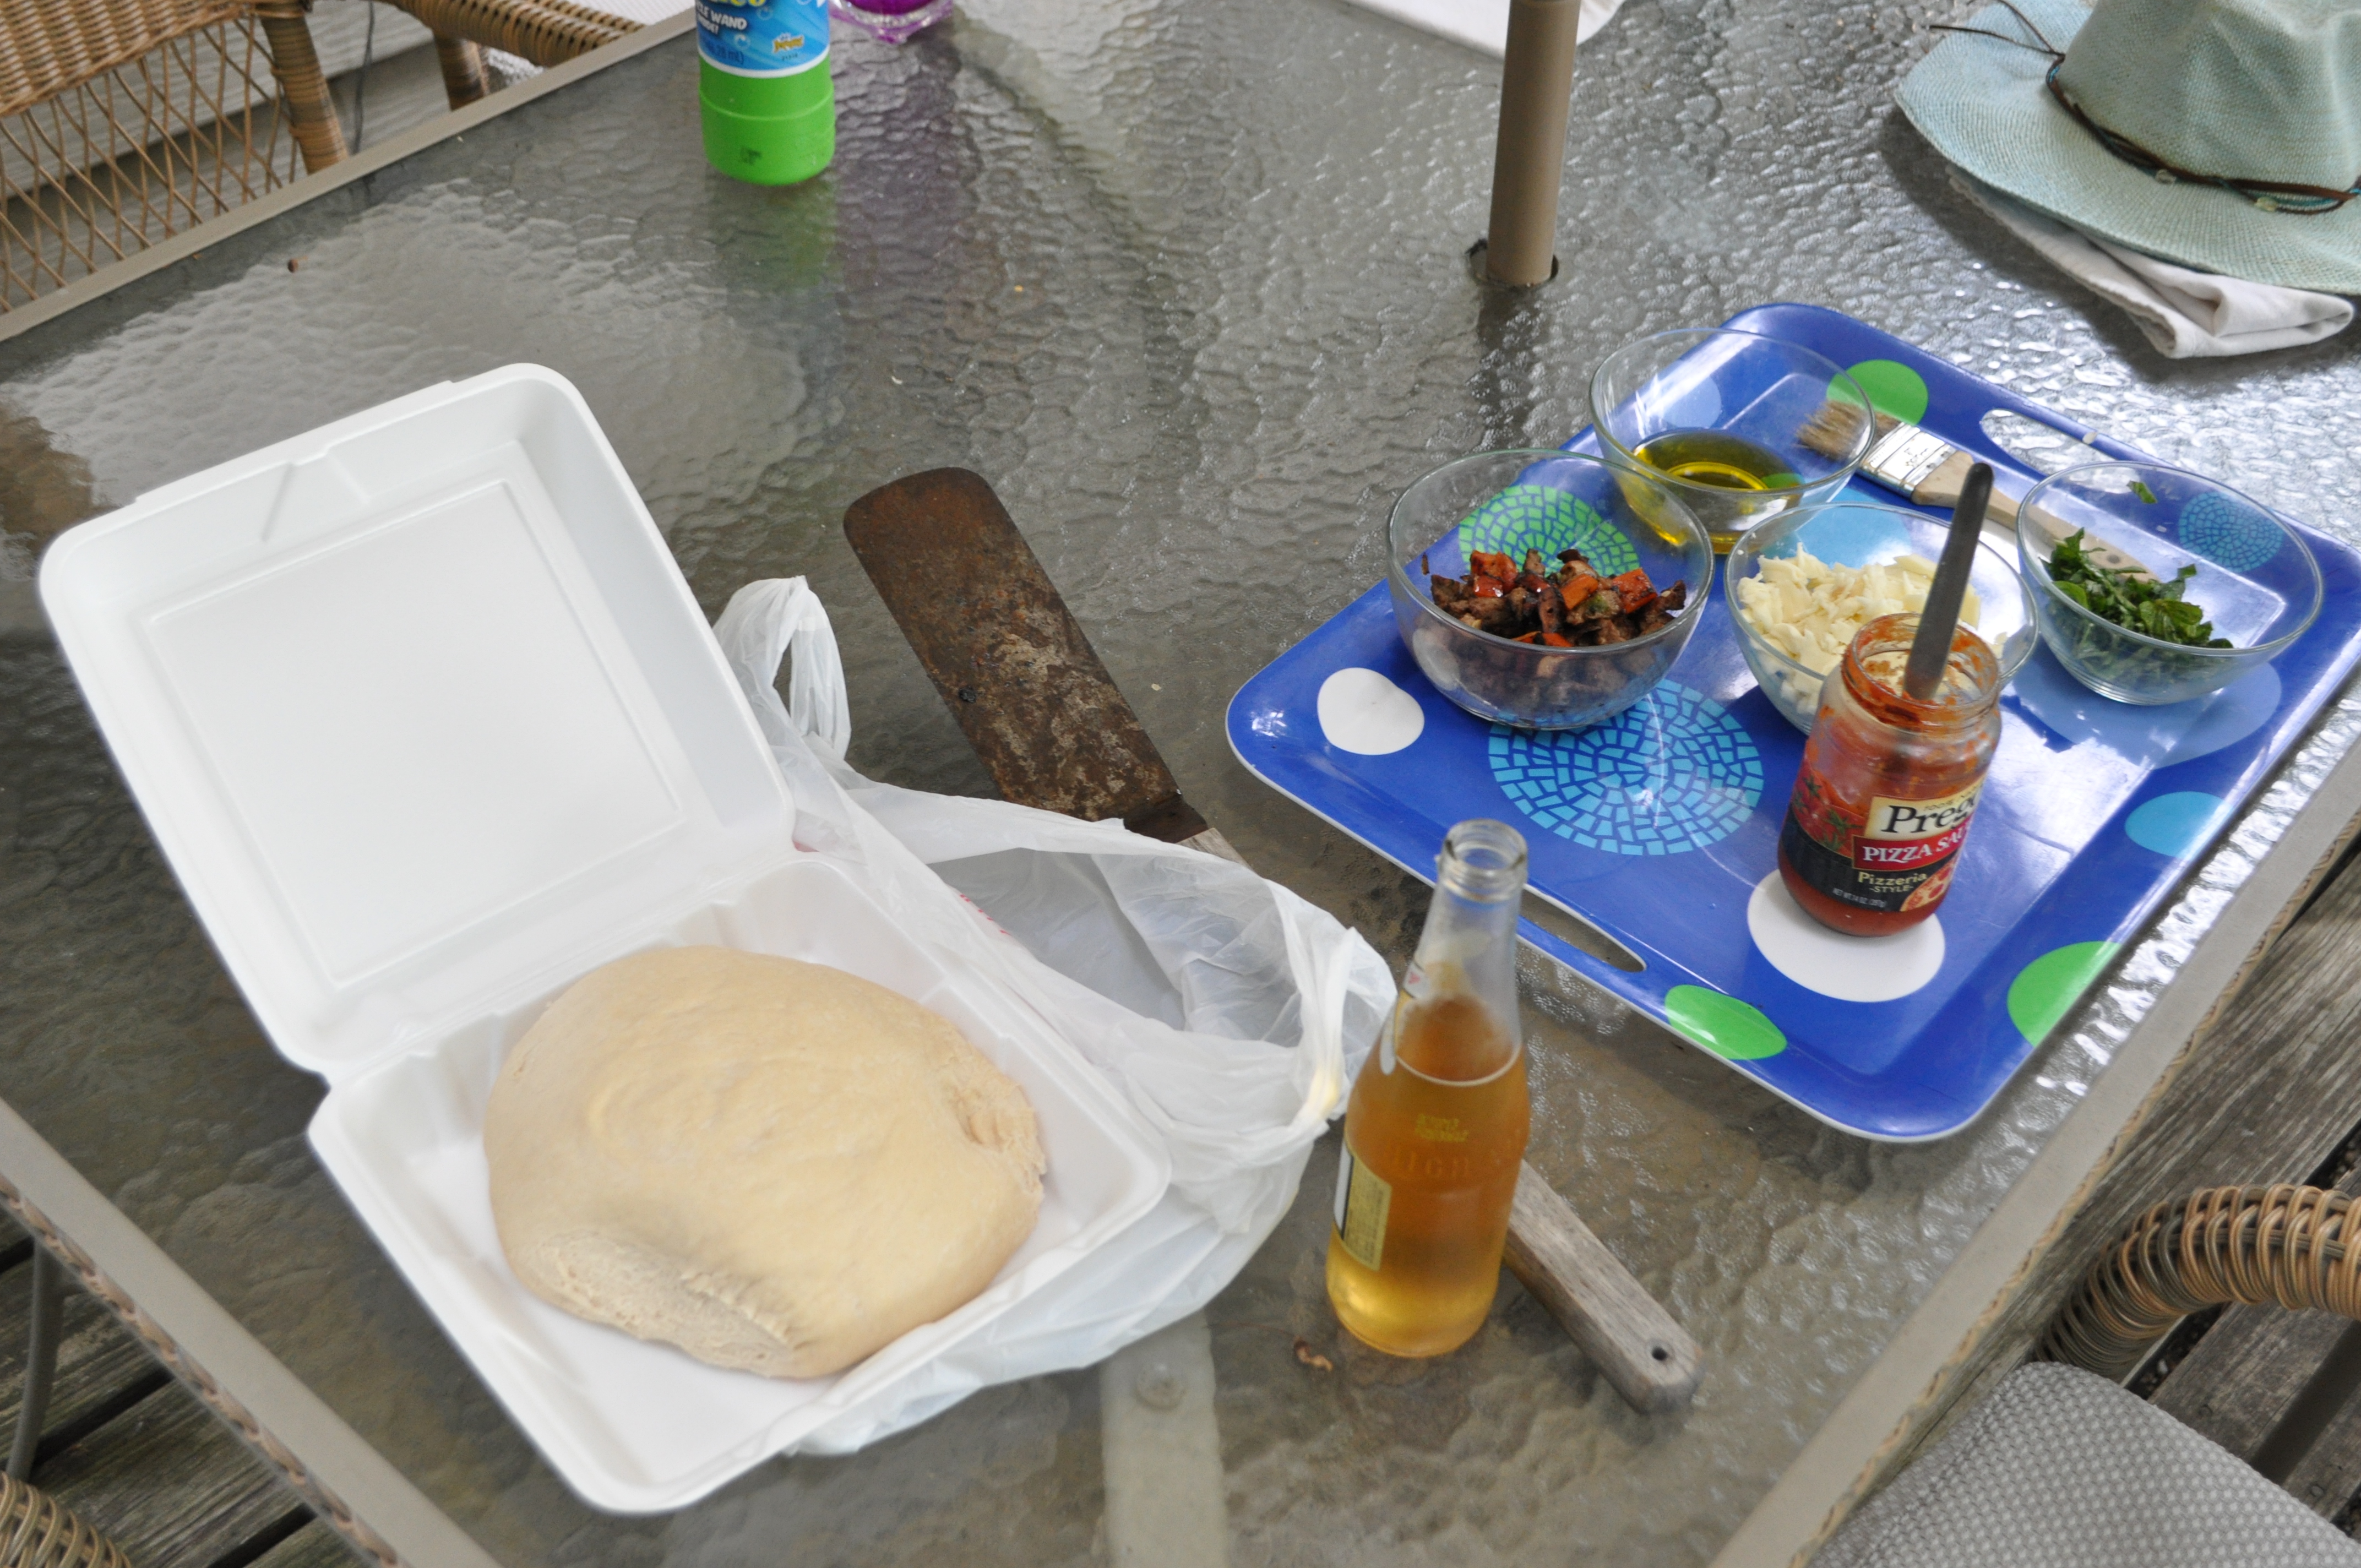
Get it together. High Life optional but recommended
Preheat, clean, and oil the grill – Turn it up as high as it goes. The reason why you’re able to make decent pizza on the grill, but not in your oven, is because the grill gets a few hundred degrees hotter. Give it at least 15 minutes to get blazing hot (or more, depending on how your grill works). Make sure it’s clean and well-oiled, or your crust will stick and break.
Stretch the dough – There are lots of ways to turn a ball of dough into something resembling a pizza. My preferred technique is to stretch it to a disc, then hold it vertically by the edge, letting the dough fall downward while stretching the cornicione a little bit. Keep turning and stretching, allowing gravity do most of the work but helping to keep a pretty uniform thickness. Basically, make the crust as big and thin as you can without breaking and without being too big for your grill.
Almost ready to flip
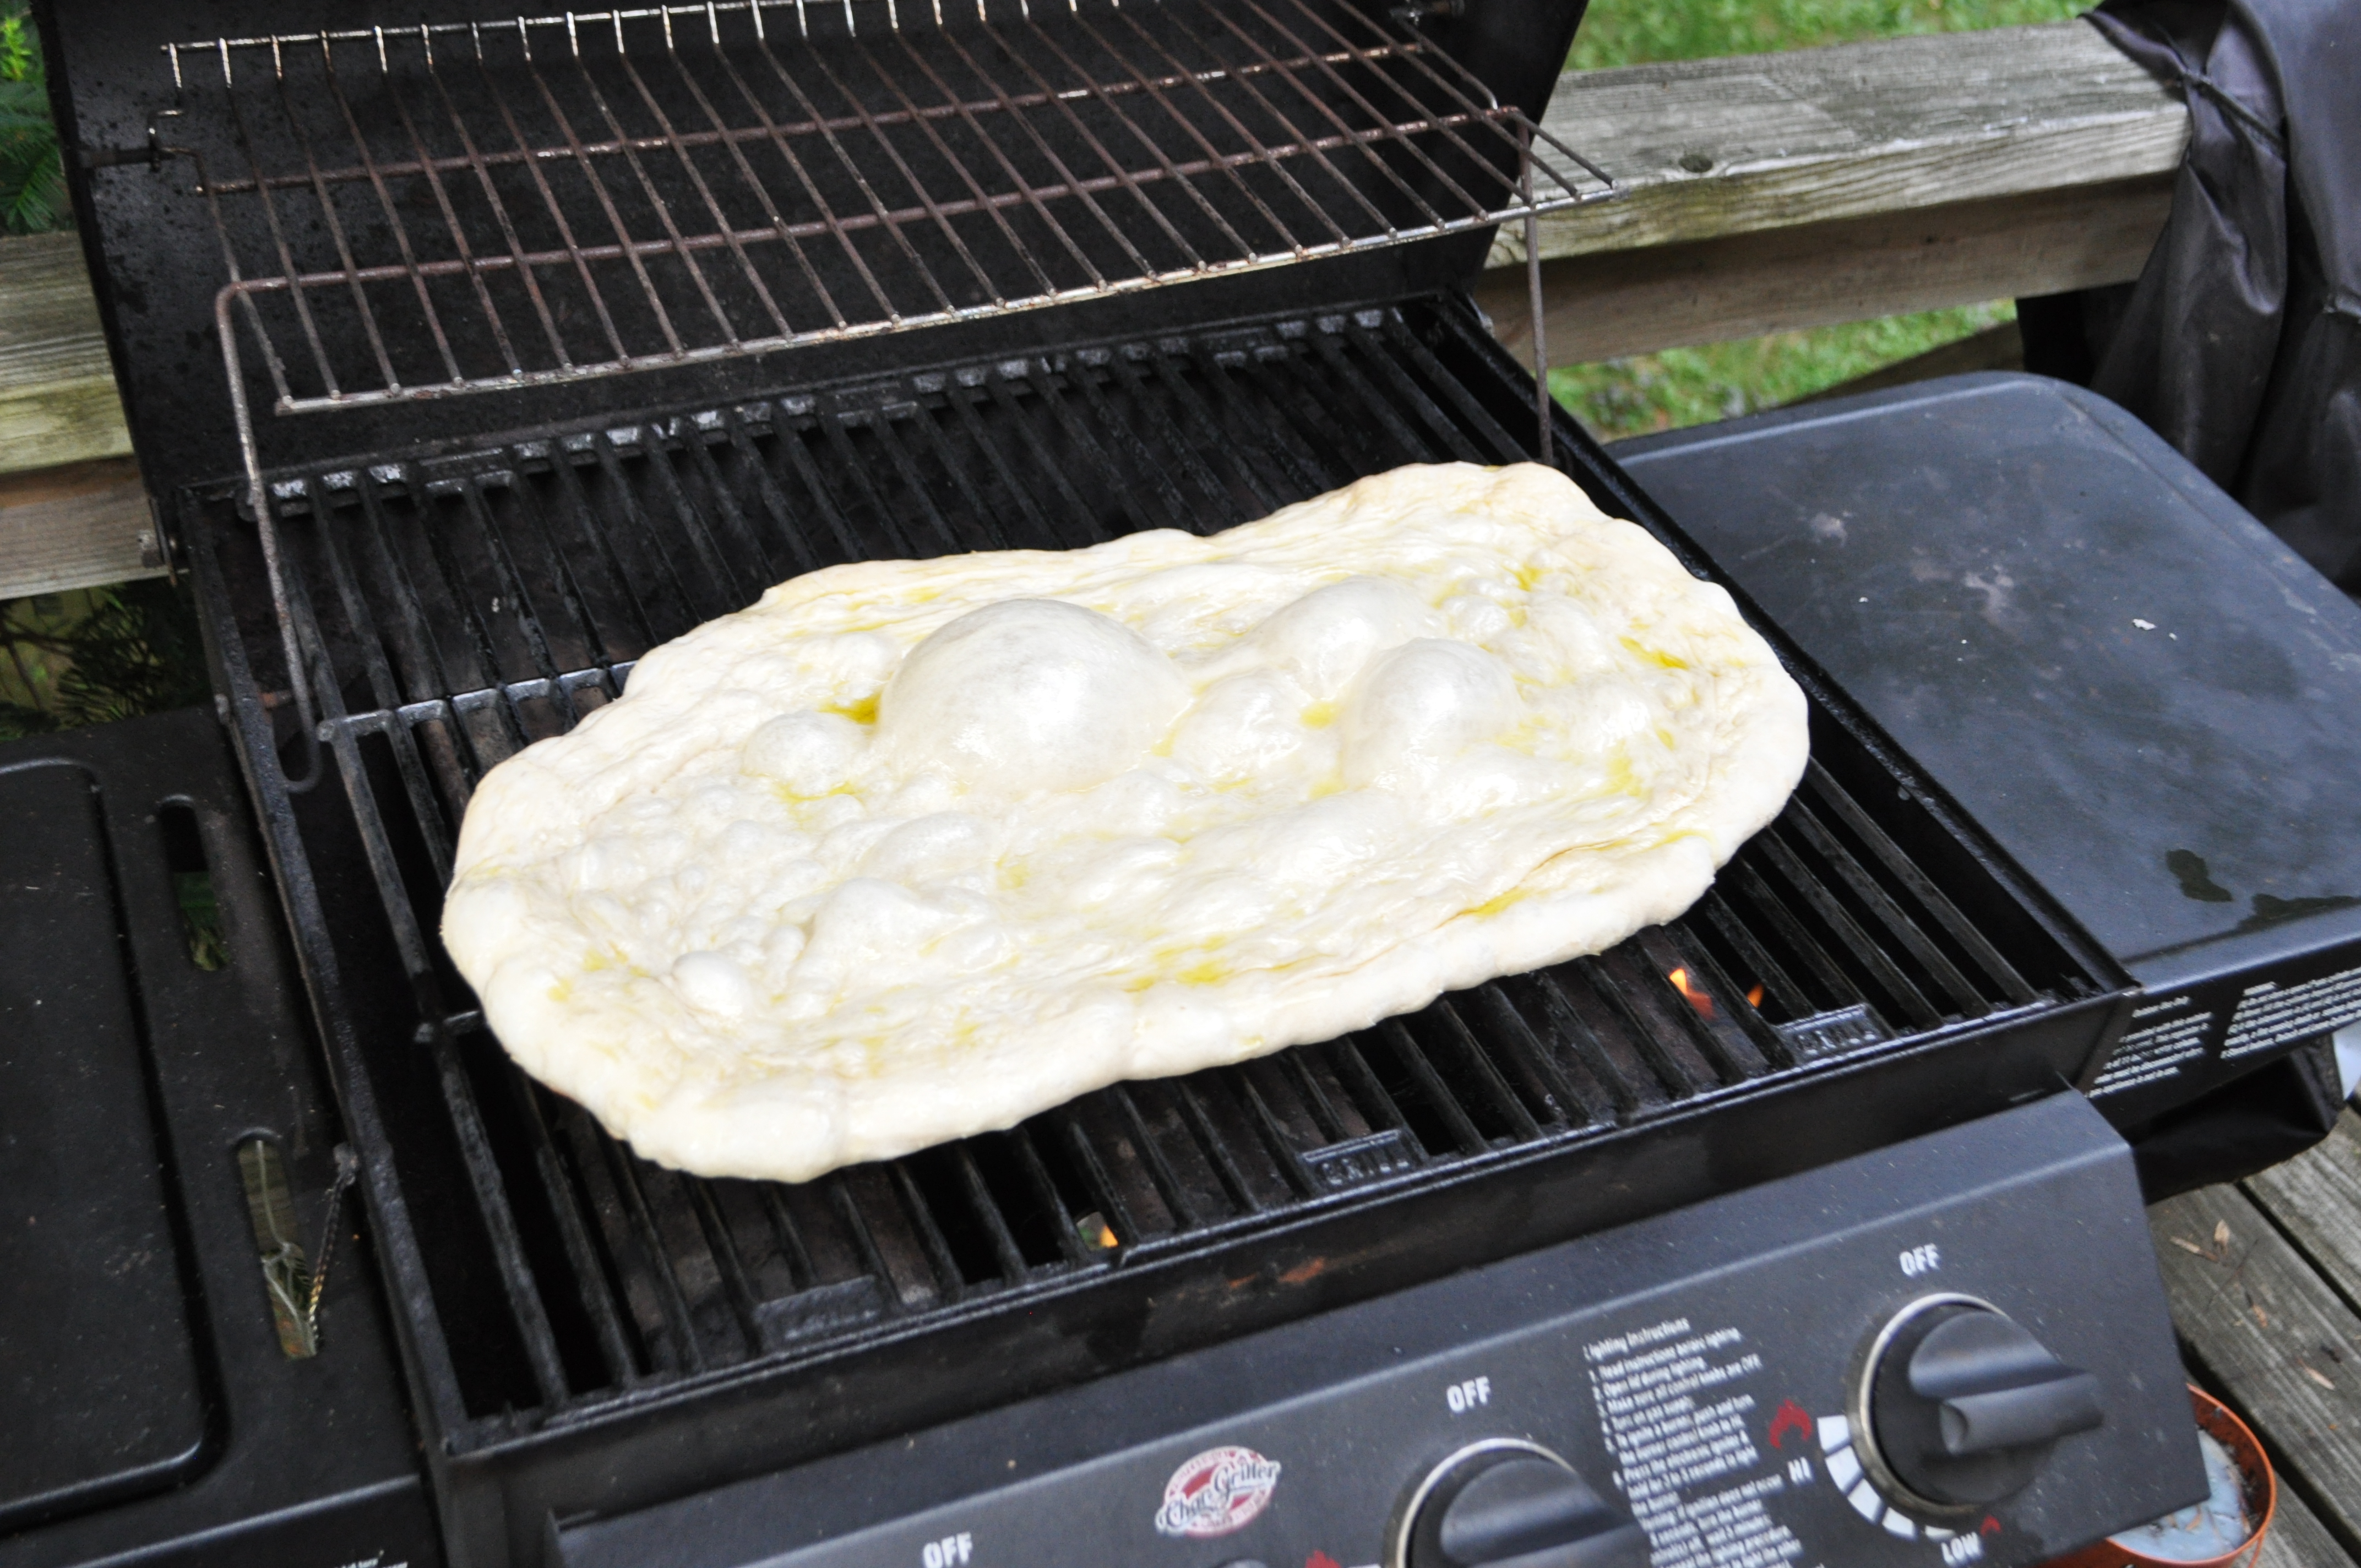
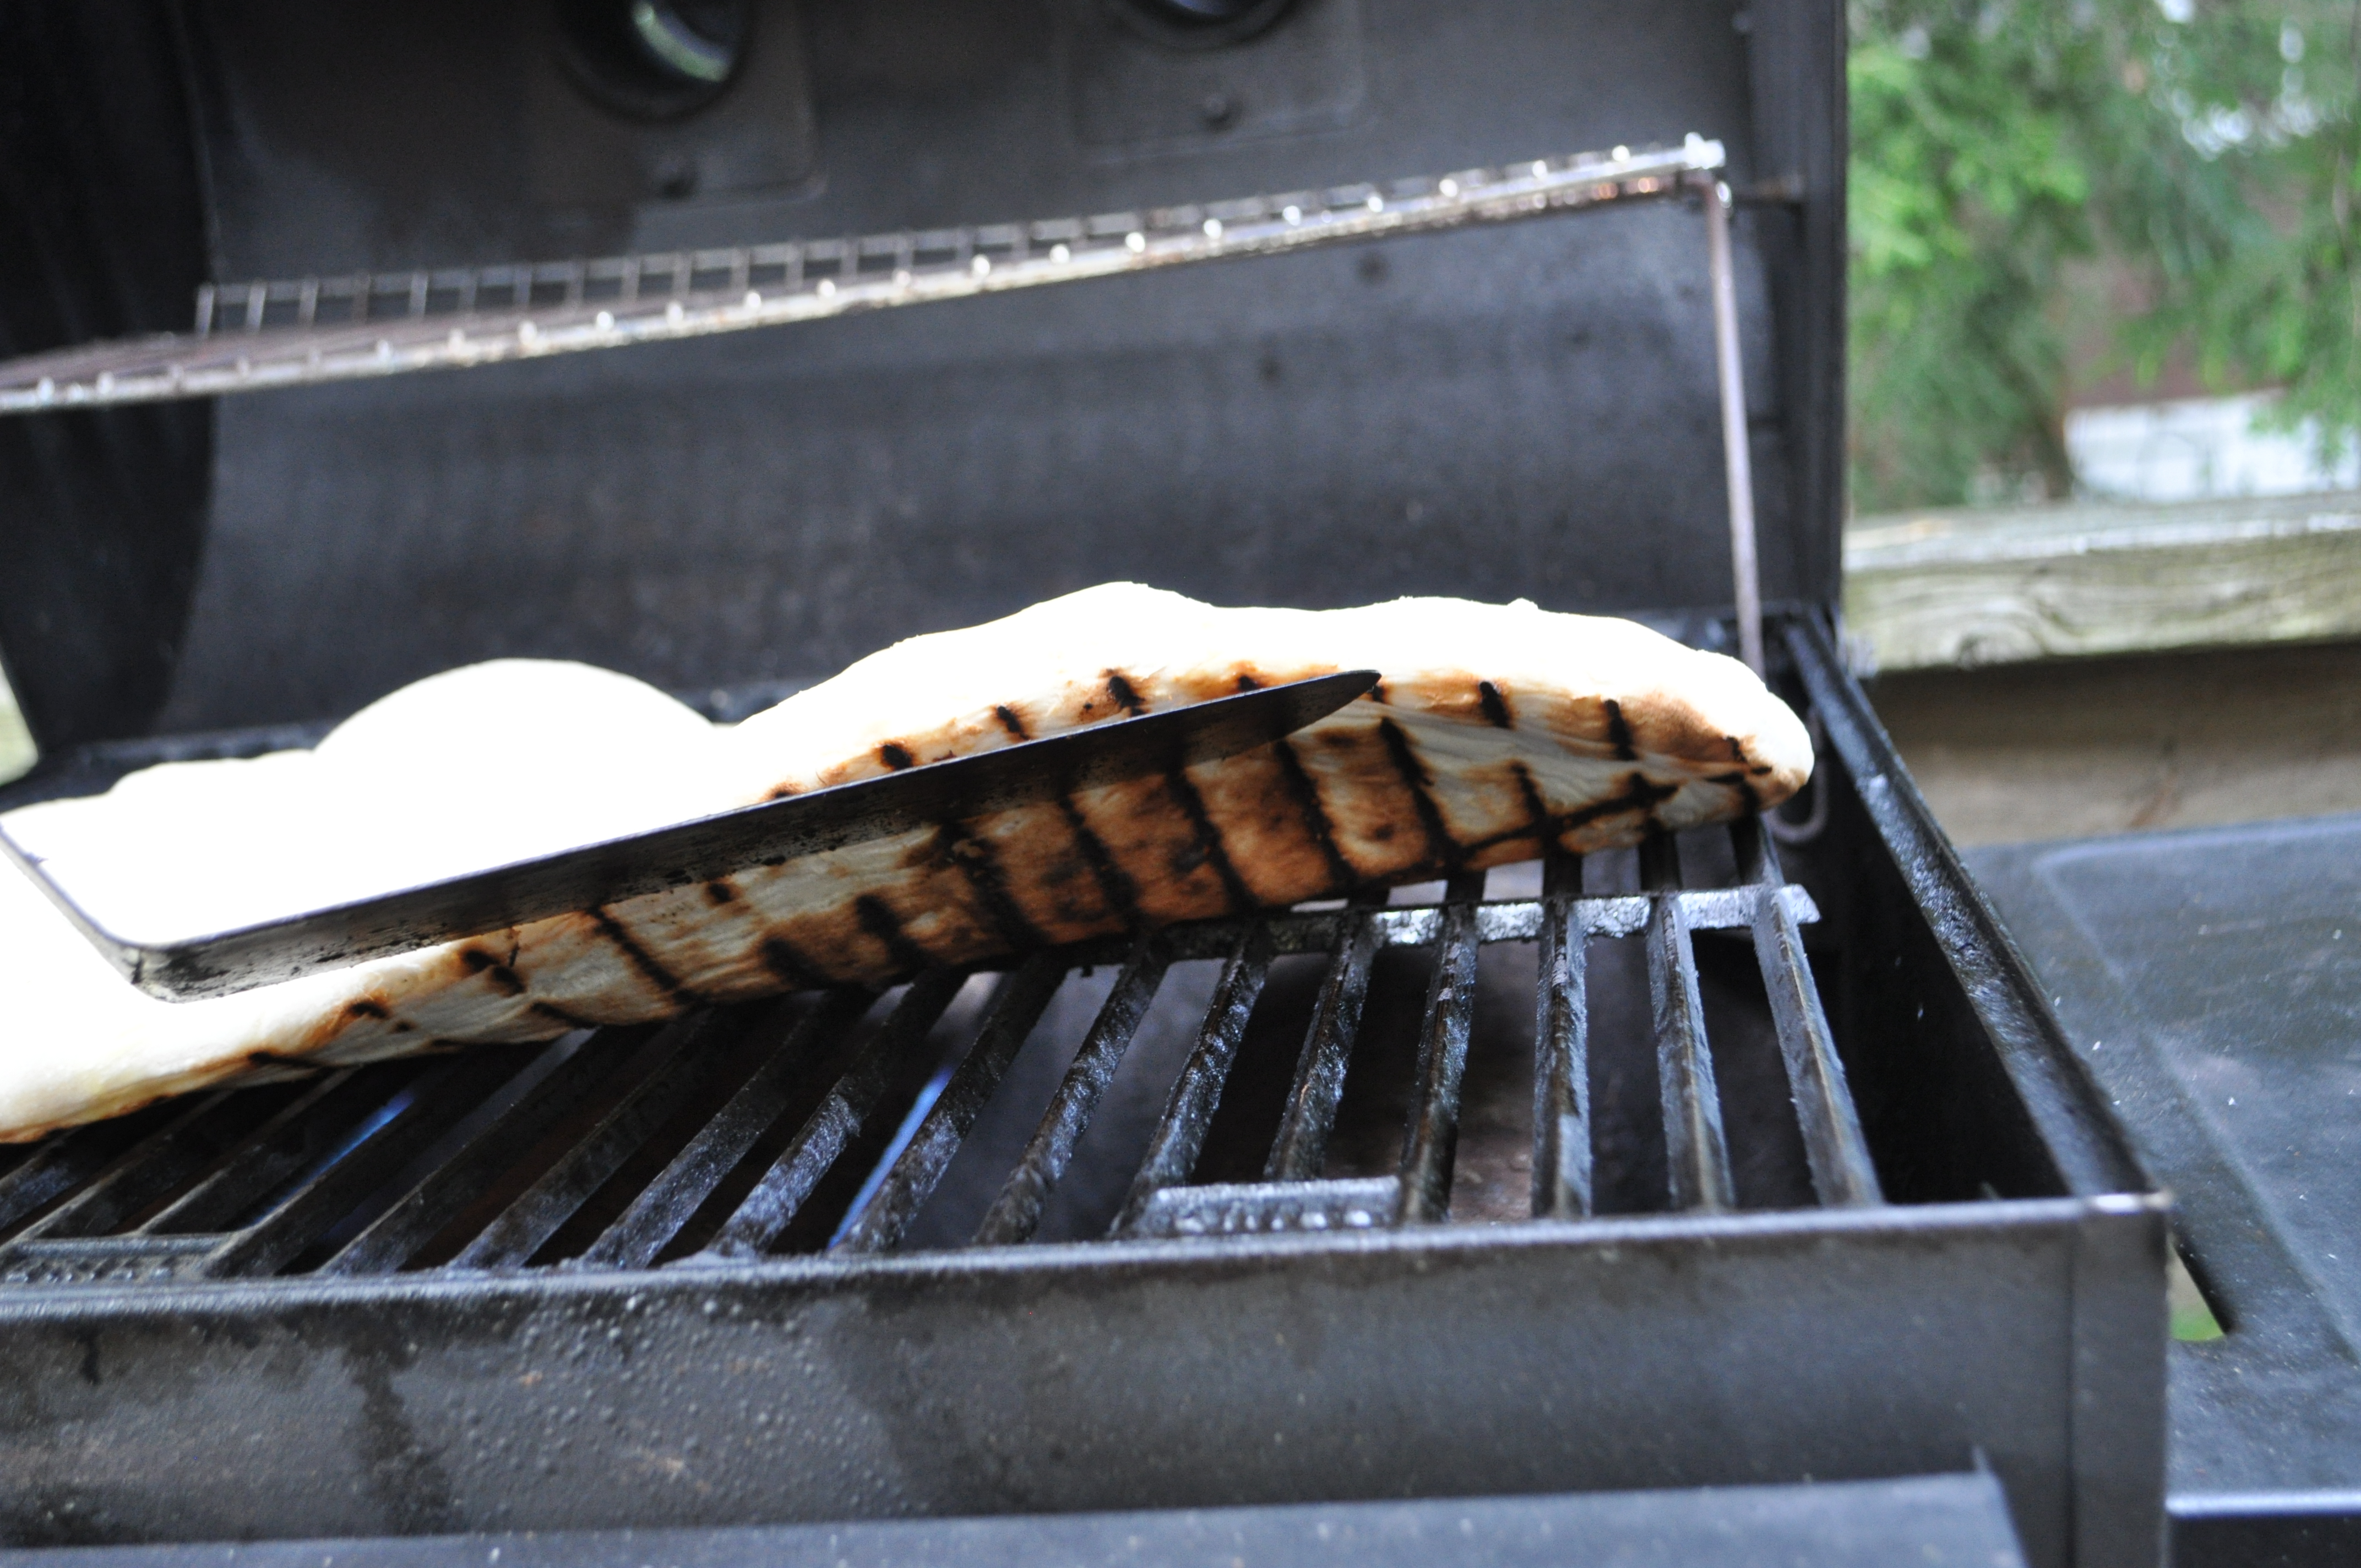
First grilling – It’s time to give a quick sear to what will end up being the top of the pizza. Lay the stretched dough on the grill. (It’s flexible, so now’s the time to make that circularish dough into a rectangularish shape, if that’s how your grill is shaped.) Brush the exposed side of the dough with olive oil. Then close the lid. Let it cook for maybe a minute, then check the upskirt. Once it’s charred to your liking, turn the burners all the way down – this’ll be important in a second. Use a big long spatula to make sure the whole crust is loose from the grill, and then use that same spatula (along with some tongs, or your hands) to flip the crust over.
Upskirt (that’s a technical term)
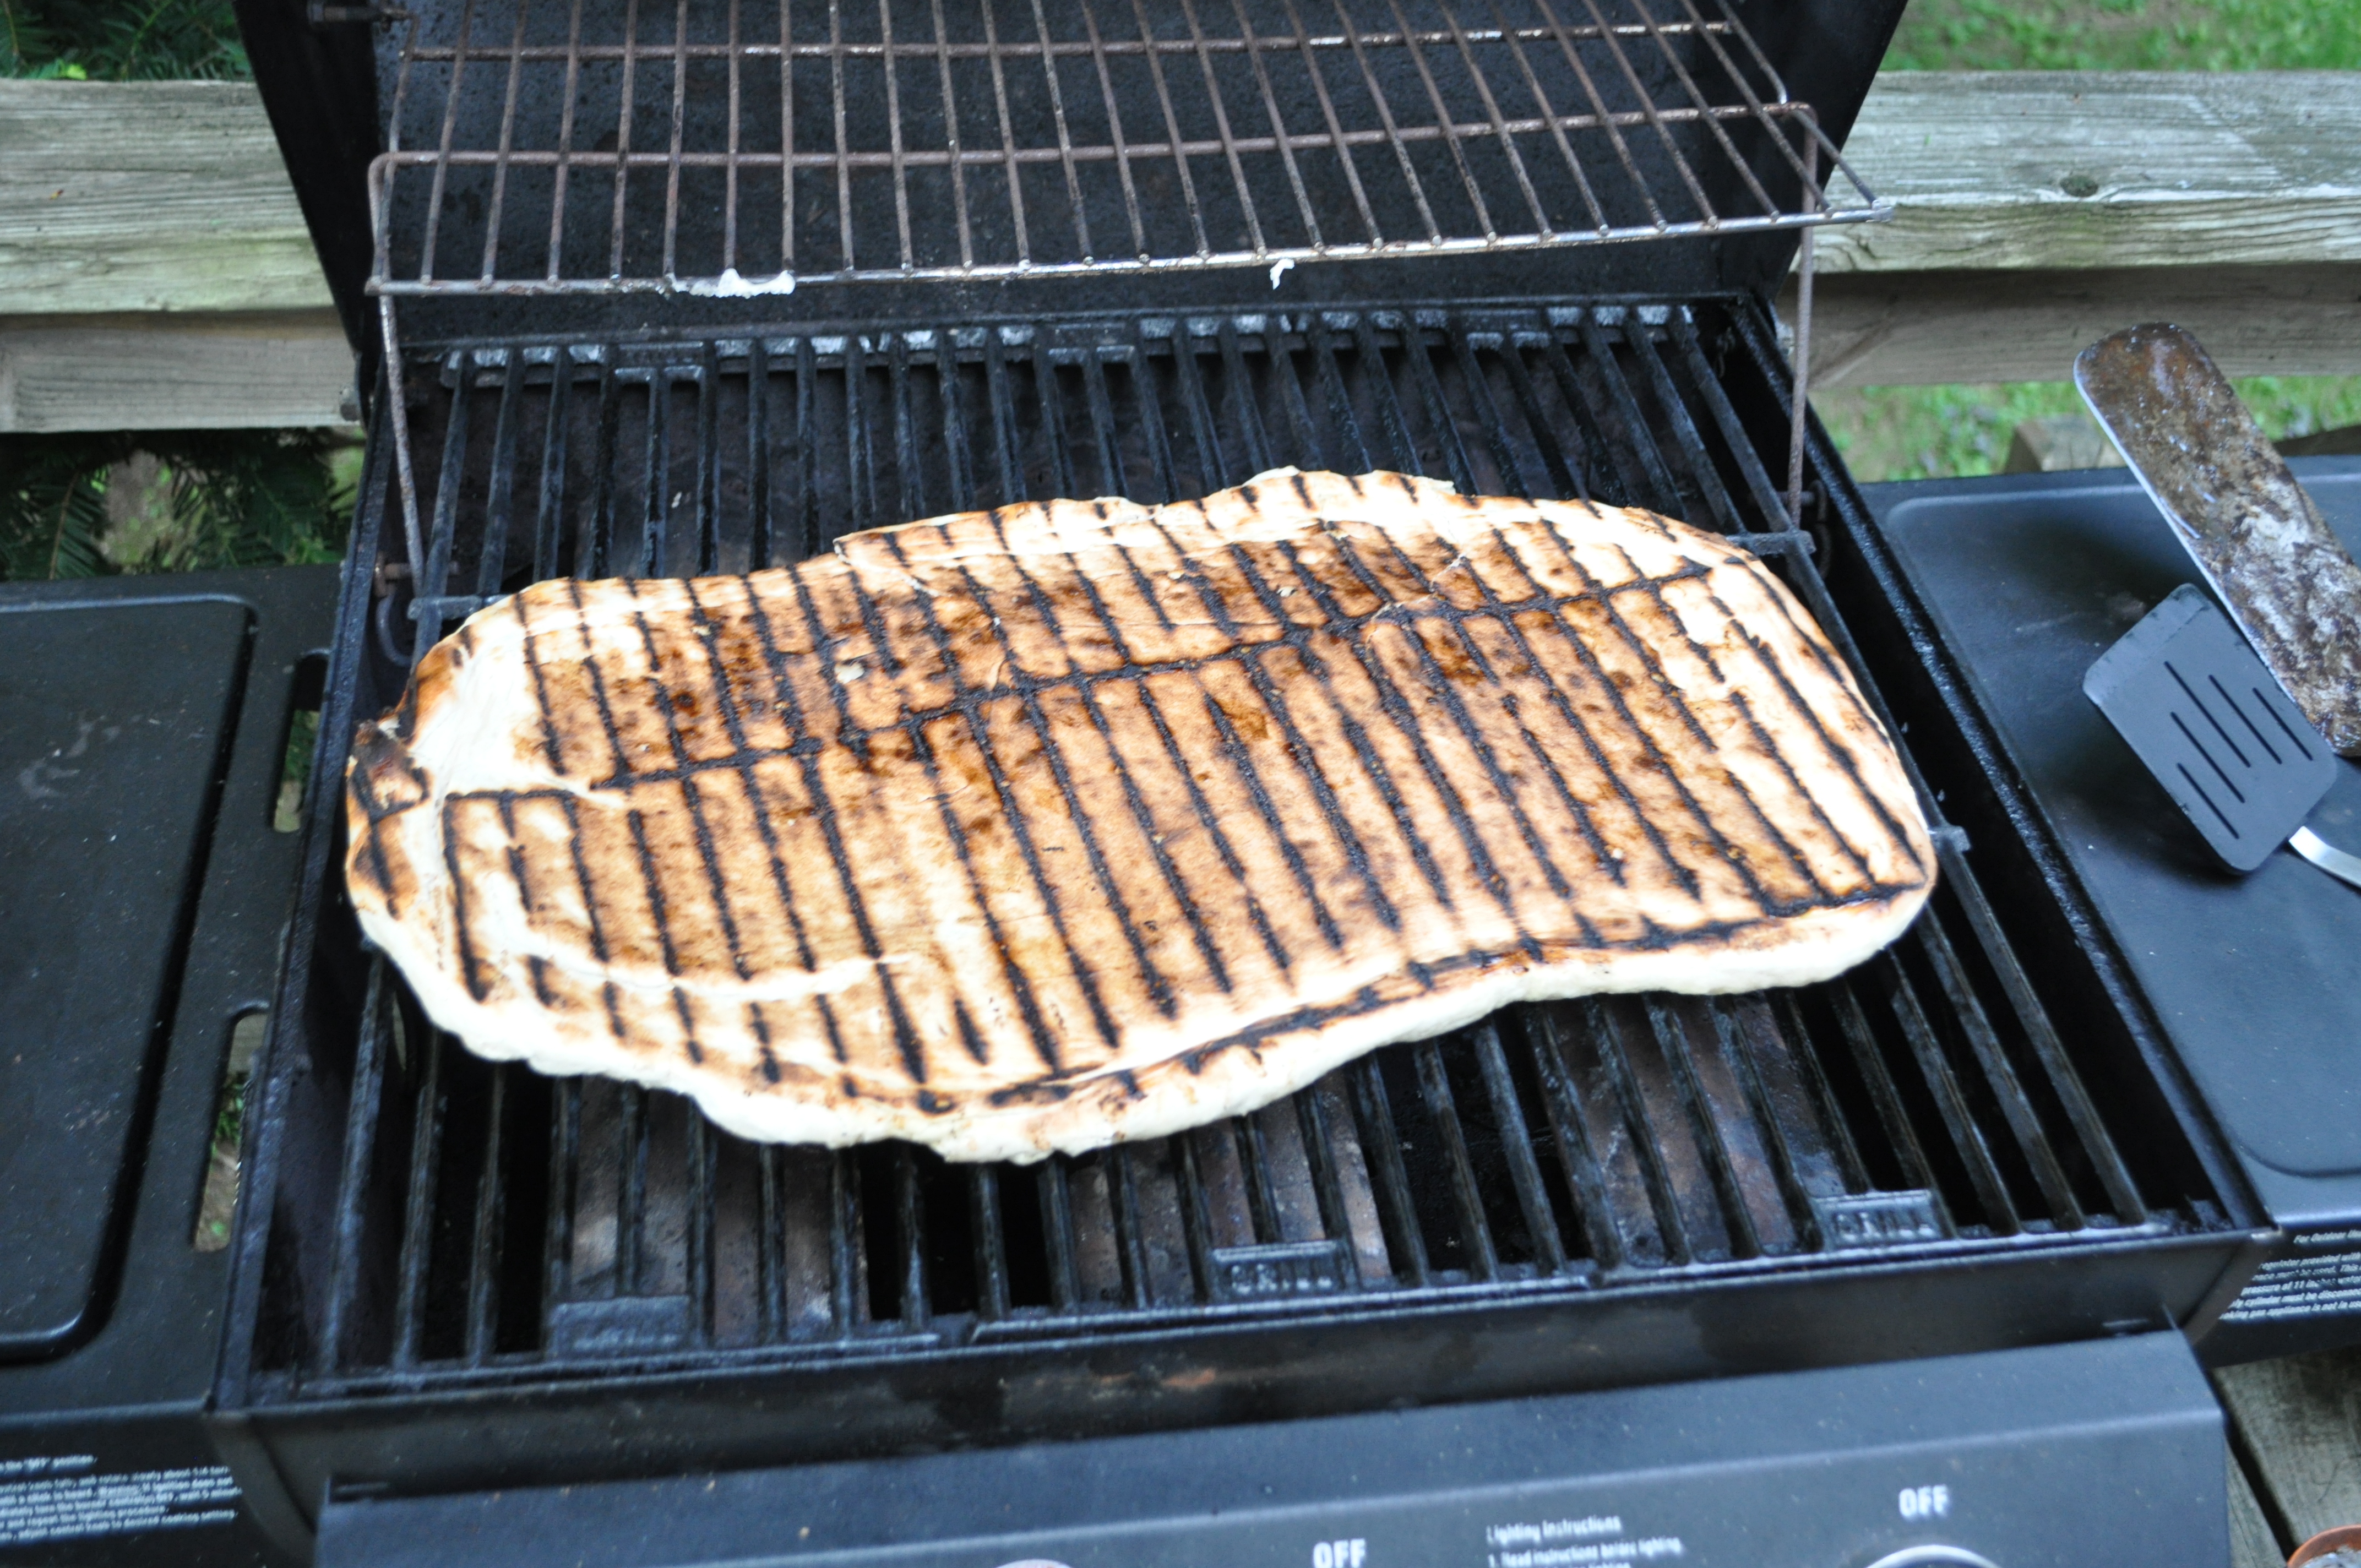
Post-flip
Top the pizza – You’ve turned the burners way down, but the grates are still very hot. You’ll want to top the pizza as quickly as possible, so you can get the lid closed and the cheese melted before the bottom has a chance to burn. Brush the pie with oil. Then sauce and cheese – if you put the cheese down first, it melts a little better, but it’s harder to then spread the sauce, so experiment to your liking. Then the toppings. It’s helpful to have two people working here, one doing the oil, the other following right behind with sauce, and so on.
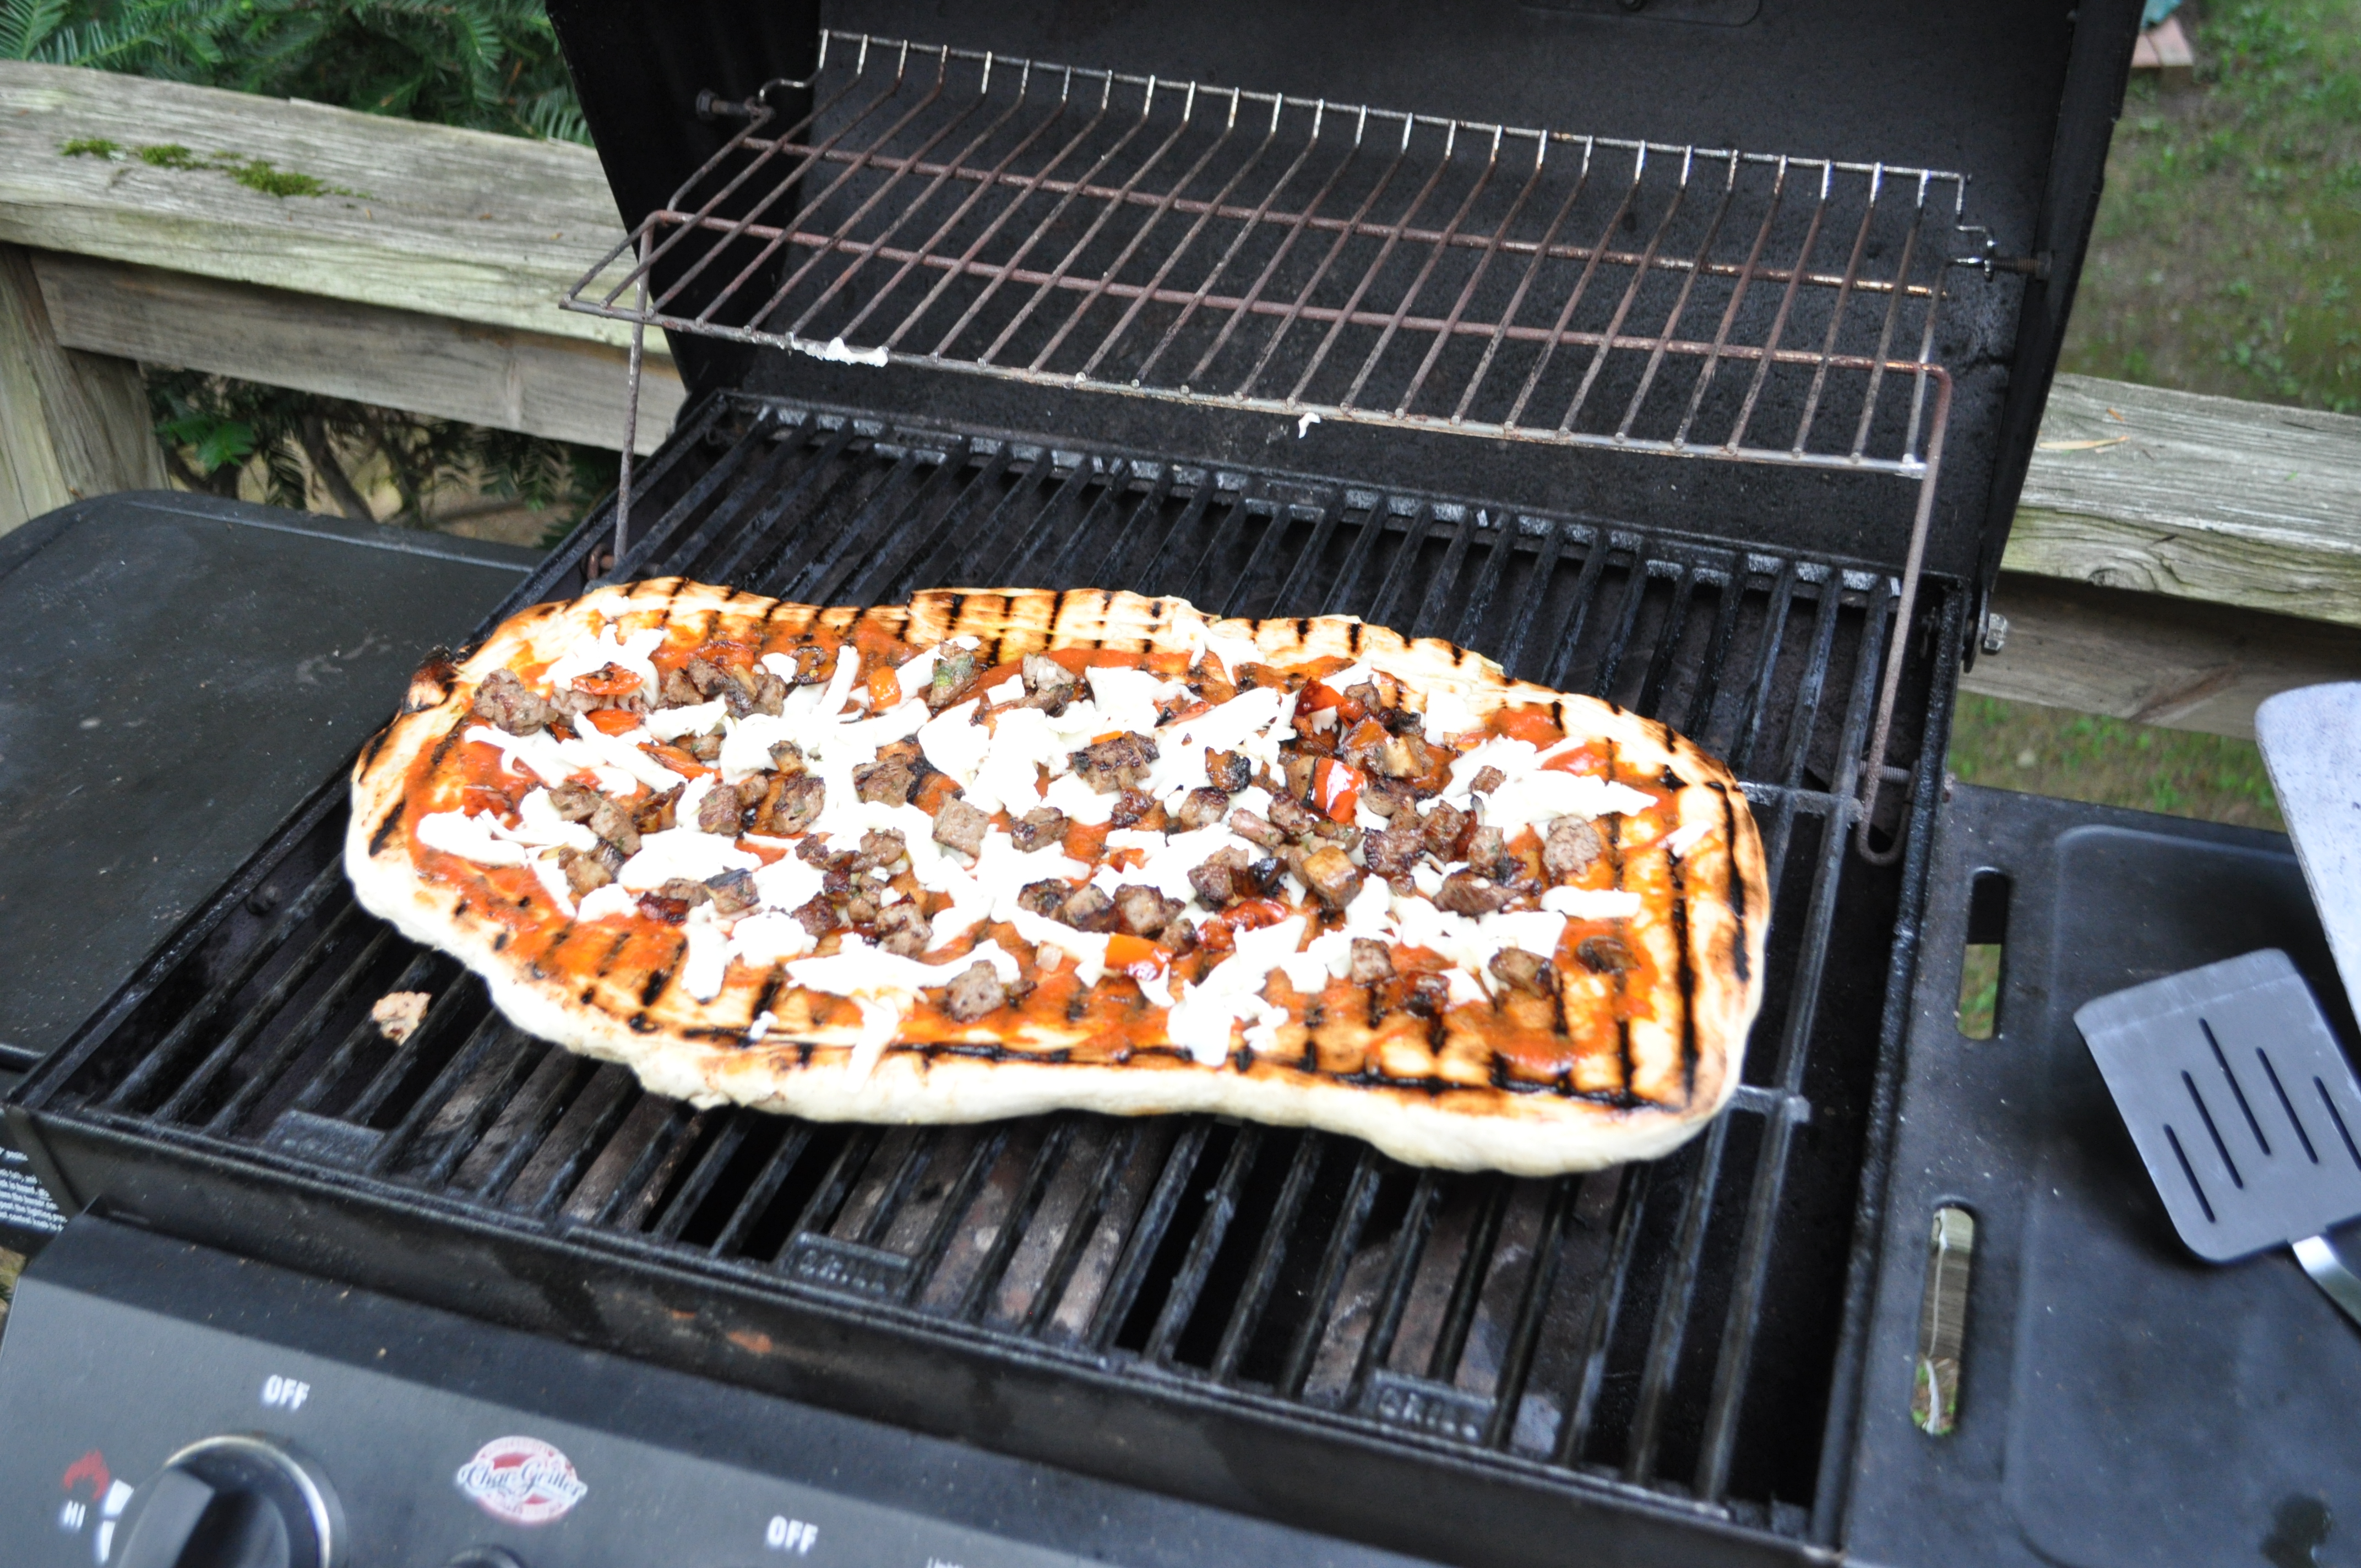
Topped and ready for the second cooking
Let it cook – Close the lid and crank the heat up all the way again. Because the grill cooled a lot while you had it open to flip and top (when the heat was turned down), this second cooking will take a bit longer than the first. Check the pizza after two or three minutes. You’re looking for two things: the cheese should be adequately melted, and the bottom of the crust should look adequately done. If it seems like the crust is cooking too fast, turn down the heat.
Voilà
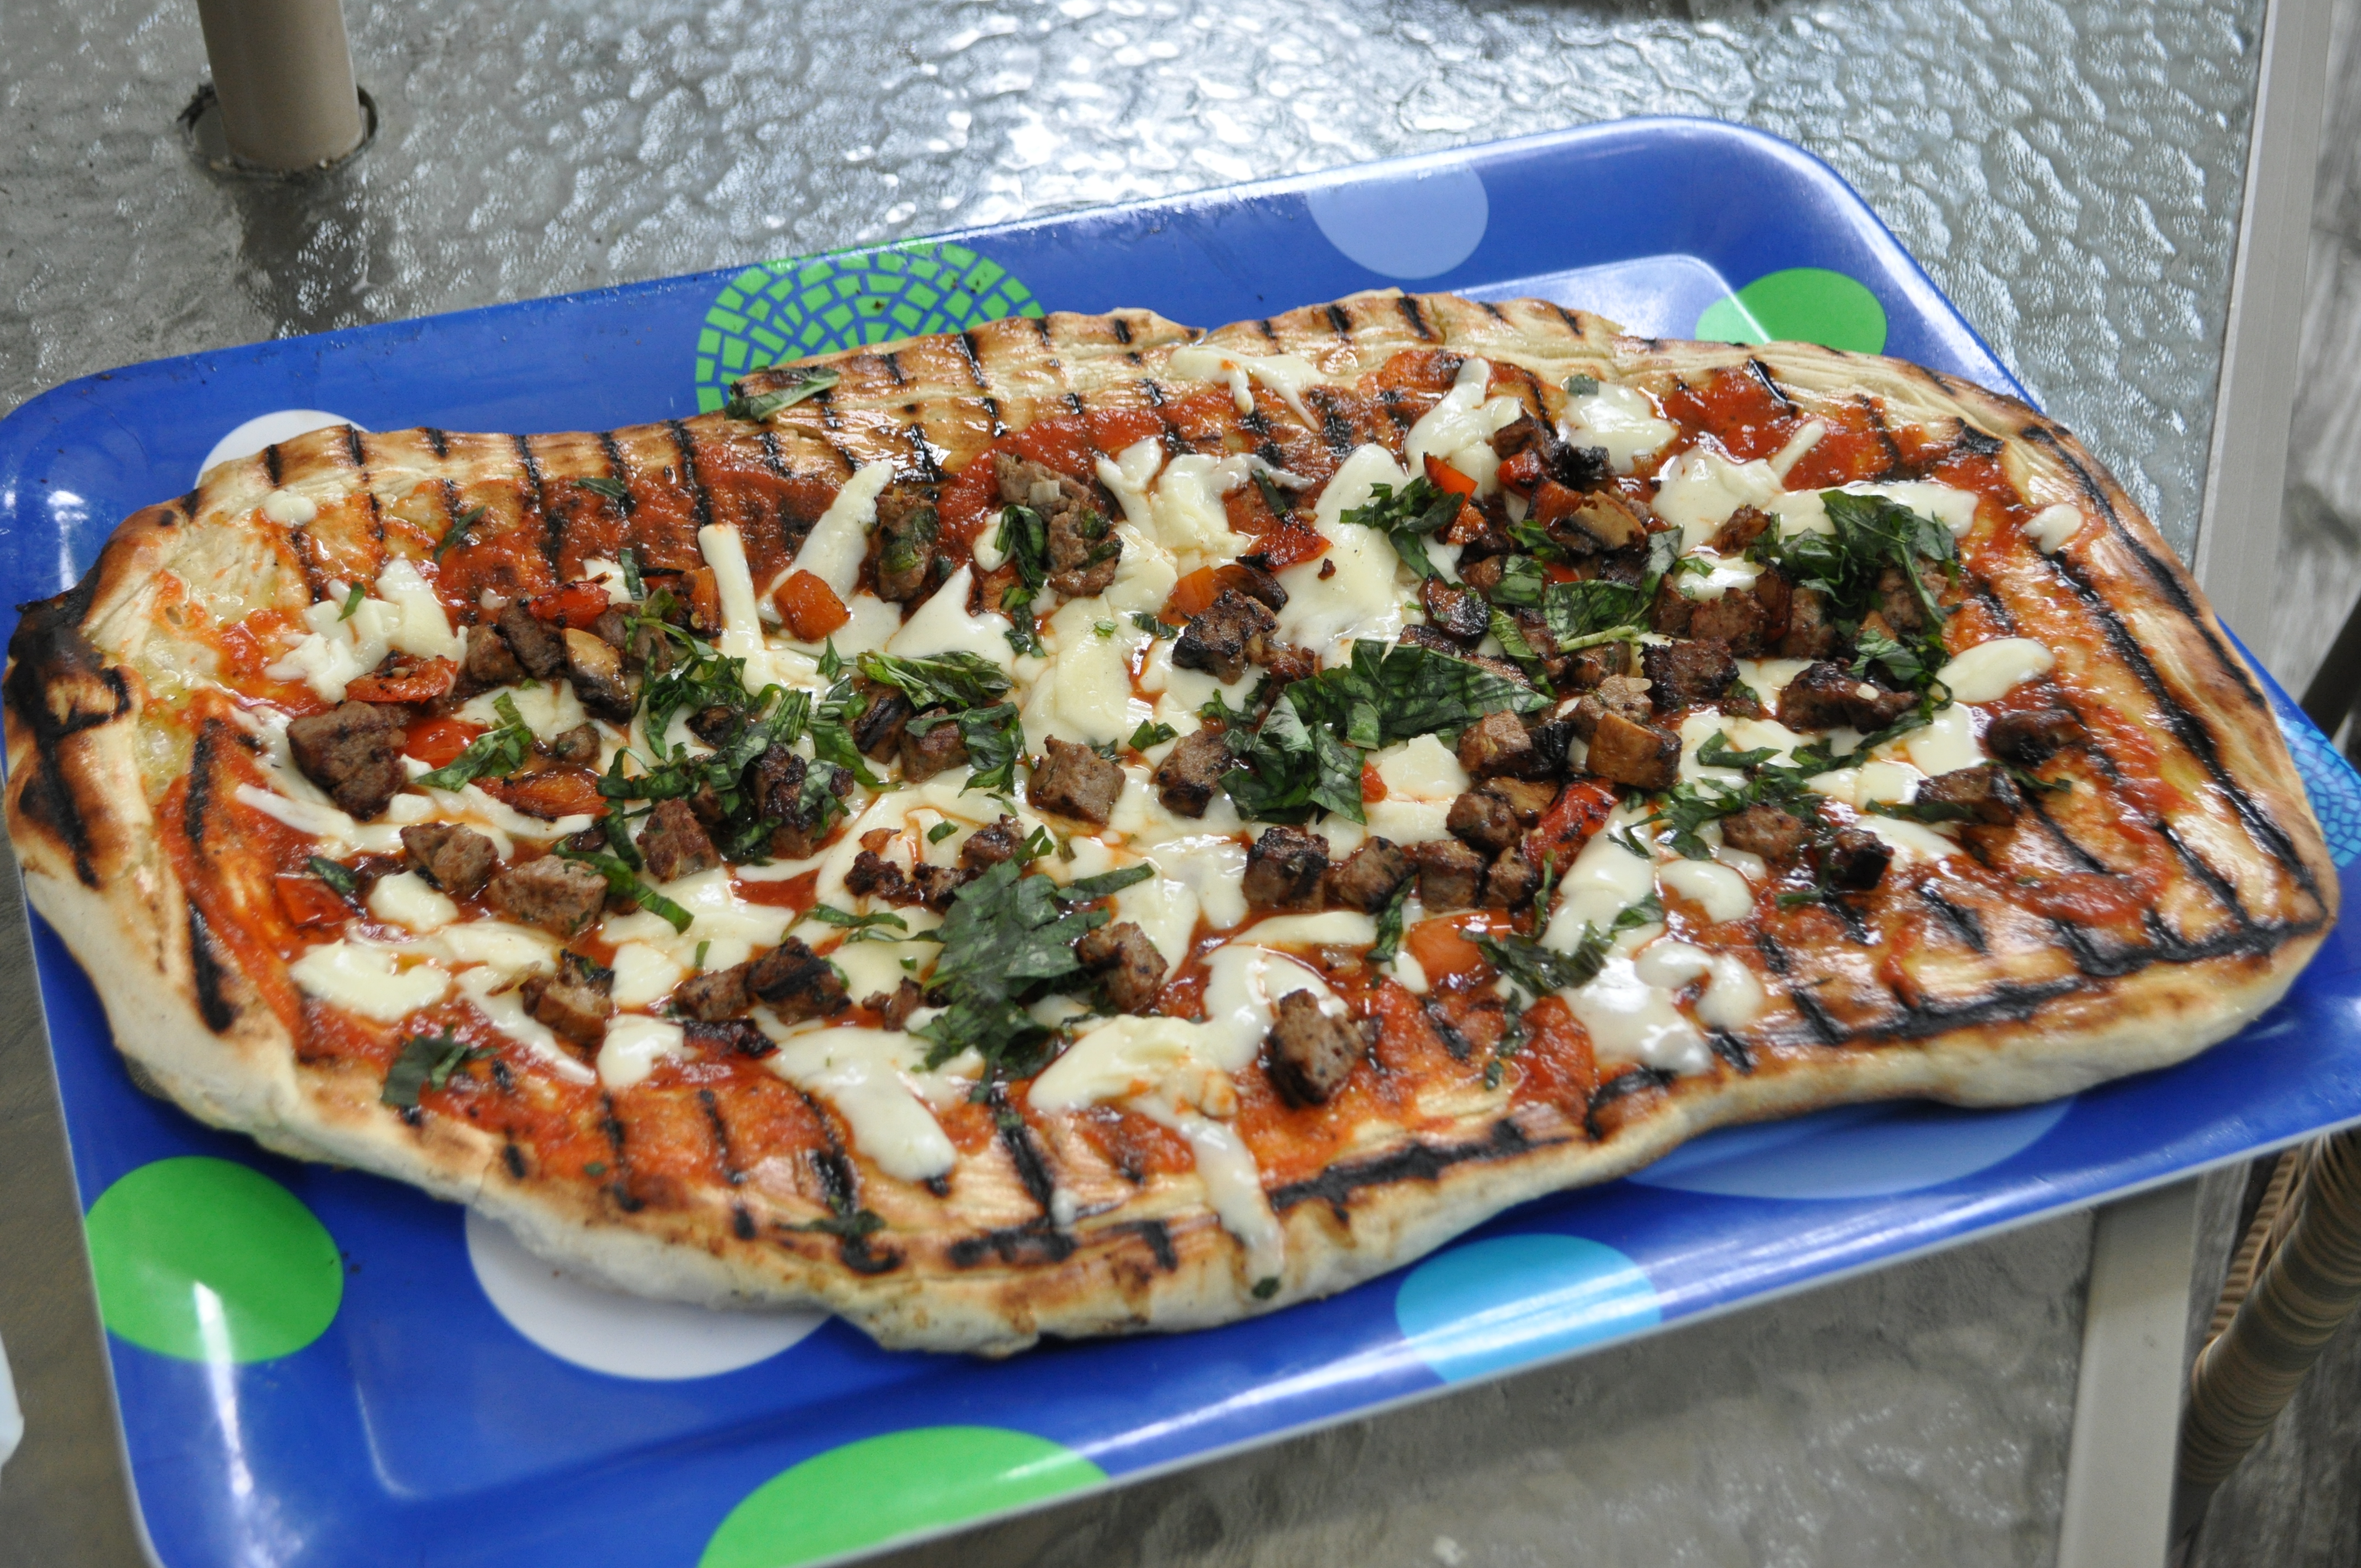
Remove and dress – Get a platter, and use your big spatula to get the pizza off of the grill. Depending on size and thickness of crust, it should be pretty firm and easy to handle. This is when I like to dress with basil and a drizzling of oil. Some Parmasean or Romano cheese would also be good.
Here are a few of the pies we made over the course of our stay:
Unless you’ve got a special oven made for cooking pizza in your kitchen, the technique described above is likely to get you the best home-cooked pizza you can make. It’s a cheap and delicious way to put leftovers to good use. Hop to it, before grilling season is over!
Boone,
I have never been so excited to read one of your blog posts as I was this one (and that’s saying a lot!).
I have been making pizza from scratch about once per month for a decade or so. We started grilling pizza 3 years ago on our charcoal grill.
We have had good luck with homemade crusts, but I never thought of buying it from a local joint instead. And when I got to thinking about it, I can think of a couple of places in town who male great crusts. I will be asking them if they sell them retail. Thanks for the idea!
I also do not normally put oil on the crust, unless I am making deep dish, but your pictures have me thinking, “definitely oil” for next time.
Anyway, thanks for sharing your experience at the grill. Please post if you learn anything else in this regard!
Toby
Hey Toby – Thanks for stopping by! After I published this post, lots of pizza grillers started coming out of the woodwork…sounds like you’re one of the really legit ones 😉
I’ve made homemade pizza dough before, but man, it’s a lot of work. I was pretty into baking when I was younger, but now I sadly do not have the time it takes to do it right. And when a dough is only like $3, it seems like a no-brainer.
I hope you’ll consider doing a write-up of your pizza adventures! Would love to learn more about your techniques – especially how the charcoal grill affects strategy and flavor.
Yeah i was also wondering how this math would work for charcoal grilling. Grilled deep dish like some serious grilling kung fu as well would def be interested to hear more.
I actually enjoy making my own pizza dough. I’ve been doing it for a while though, but people tell me I’m a natural when it comes to this type of stuff (sidenote: I once considered a career in the restaurant industry).
I’ve never considered doing pizza on the grill. I’ll have to try that someday. Another option for homemade pizza is to get a cheap pizza stone. If your oven can get to 500 degrees (most do), it only takes 5 or 6 minutes to cook.
I’m now seriously considering making a pizza or possibly a calzone for dinner.