Tag Archives: workflow

The number one reason to start using git: interactive staging

Git is an excellent tool for collaborative software development in a number of ways. In my opinion, Git’s most valuable feature – which also happens to be one of its most underappreciated – is interactive staging: git add -i and git add -p. If you are a software development who does not use Git, or if you use Git but do not use this feature, you should not write another line of code until you learn it.

When working on a large project, there is no principle more important than that changesets are atomic. Combining more than one distinct change into a commit is highly detrimental to a project’s history. Muddled changesets are hell for future developers on the project, including Future You. The usefulness of log, blame, bisect, and (not to get hyperbolic or anything) version control itself, depends on commits being logically small units.

But, of course, software is not built linearly. You’re writing cool new feature X, but you notice that in order to complete X, you need to fix bug Y. The problem is that you’re already halfway finished with X. You could: generate a diff file, stash/reset your changes, fix Y, commit the fix to Y, reapply the X diff, and continue work on X. This is a pain. Or you could: commit a large changeset that contains X and Y. But this is lousy for the reasons described above. Ideally, you would be able to fix Y, continue with X, and then sort out the changesets just before commit.

This is what Git’s interactive staging lets you do. Start with a clean index. Begin hacking on X. Stumble on Y. Fix Y. Complete X. Then use Git’s stage to commit Y and X separately.

Here’s a real example. (What follows is a pretty basic situation. git add -p is a subset of git add -i, which is full of whiz-bang goodies.) Say I’m working on fixing some poor localization in BuddyPress. While doing so, I notice that some PHPDoc is missing. So I fix both issues, and git diff shows the following:

is1

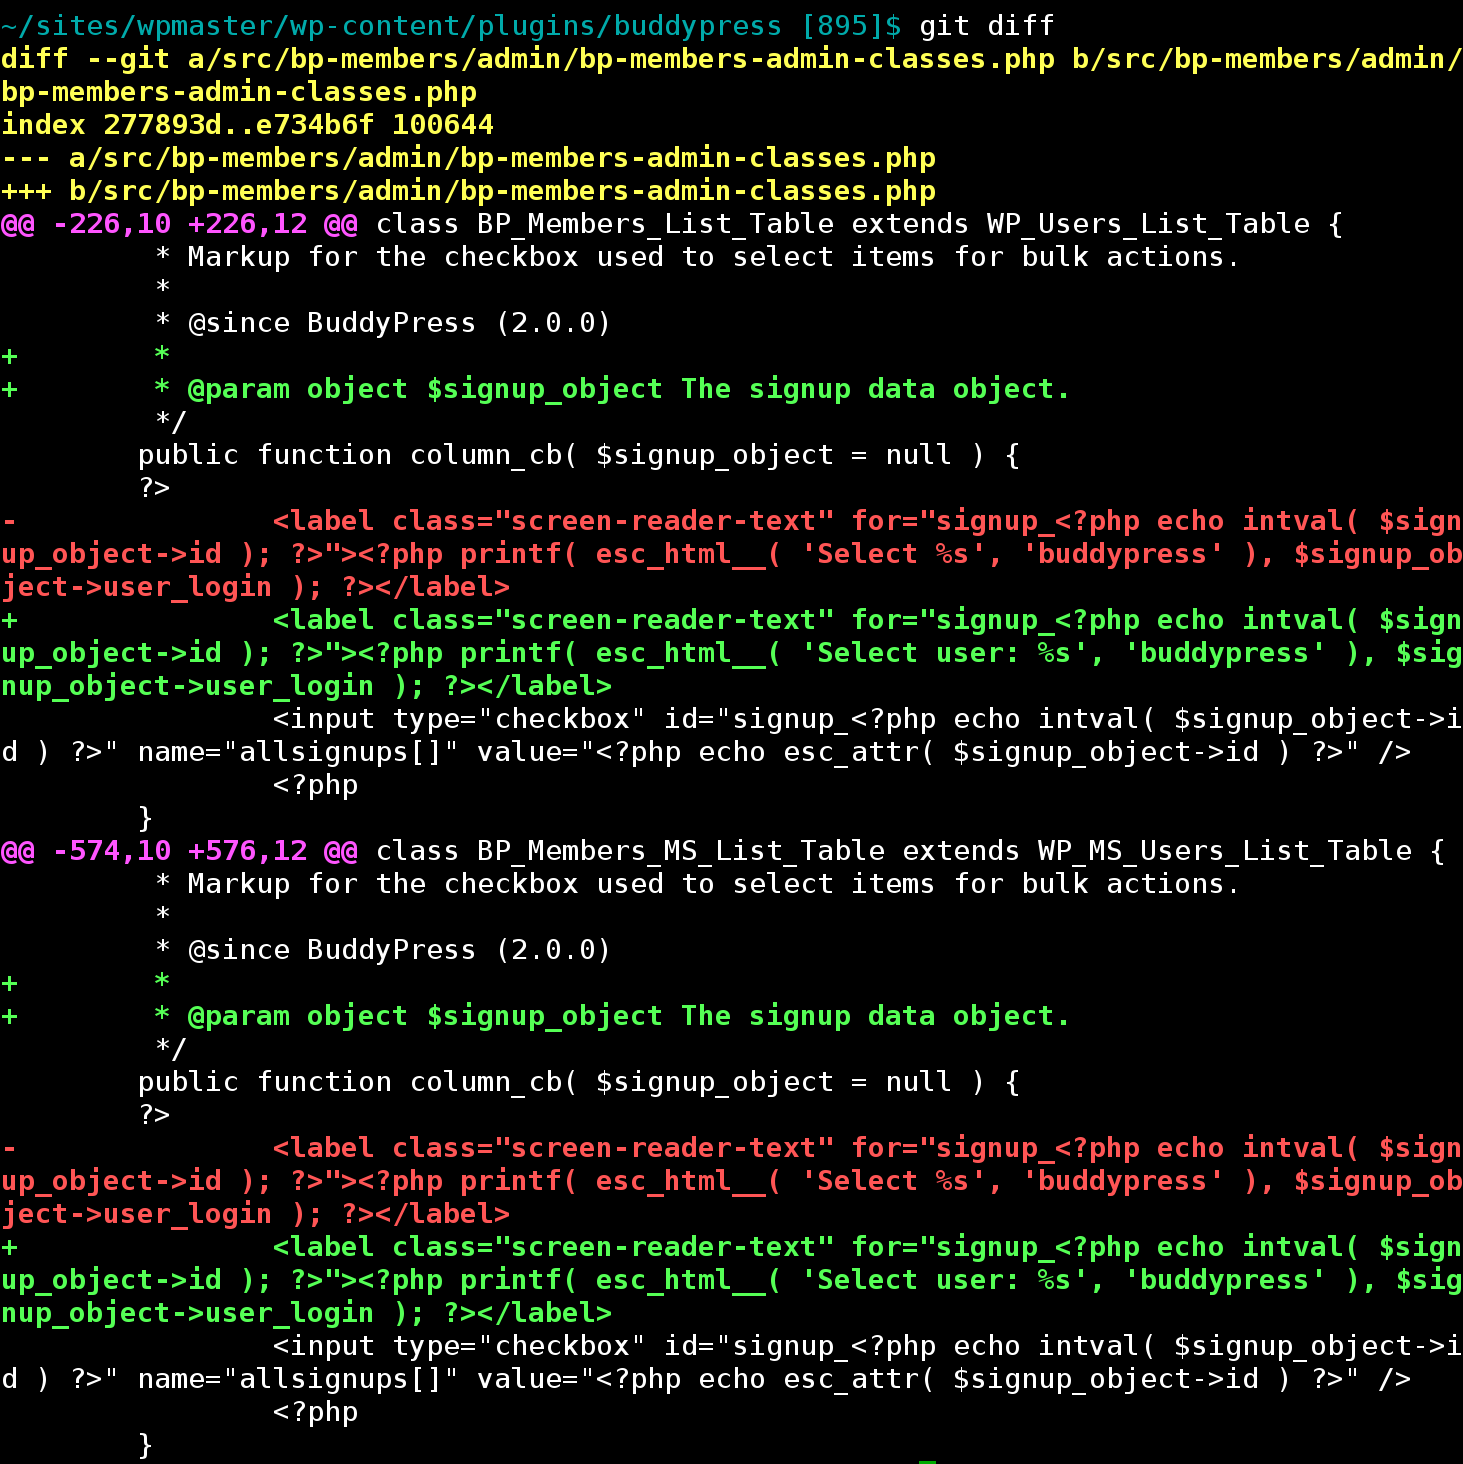
Now, I know that Changesets Should Be Atomic, so I want to commit the documentation changes separately from the bug fix. So, instead of git commit -a or git add . – which blindly stage all changes – I jump into patch mode with git add -p:

is2

Git has determined what it considers to be the first “hunk” of changes. (Hunks: it takes one to know one.) I’m then asked whether I want to “Stage this hunk”. Normally I’ll just type y or n, but in this case I see that Git hasn’t made the hunks small enough, so I choose s, for “split”:

is3

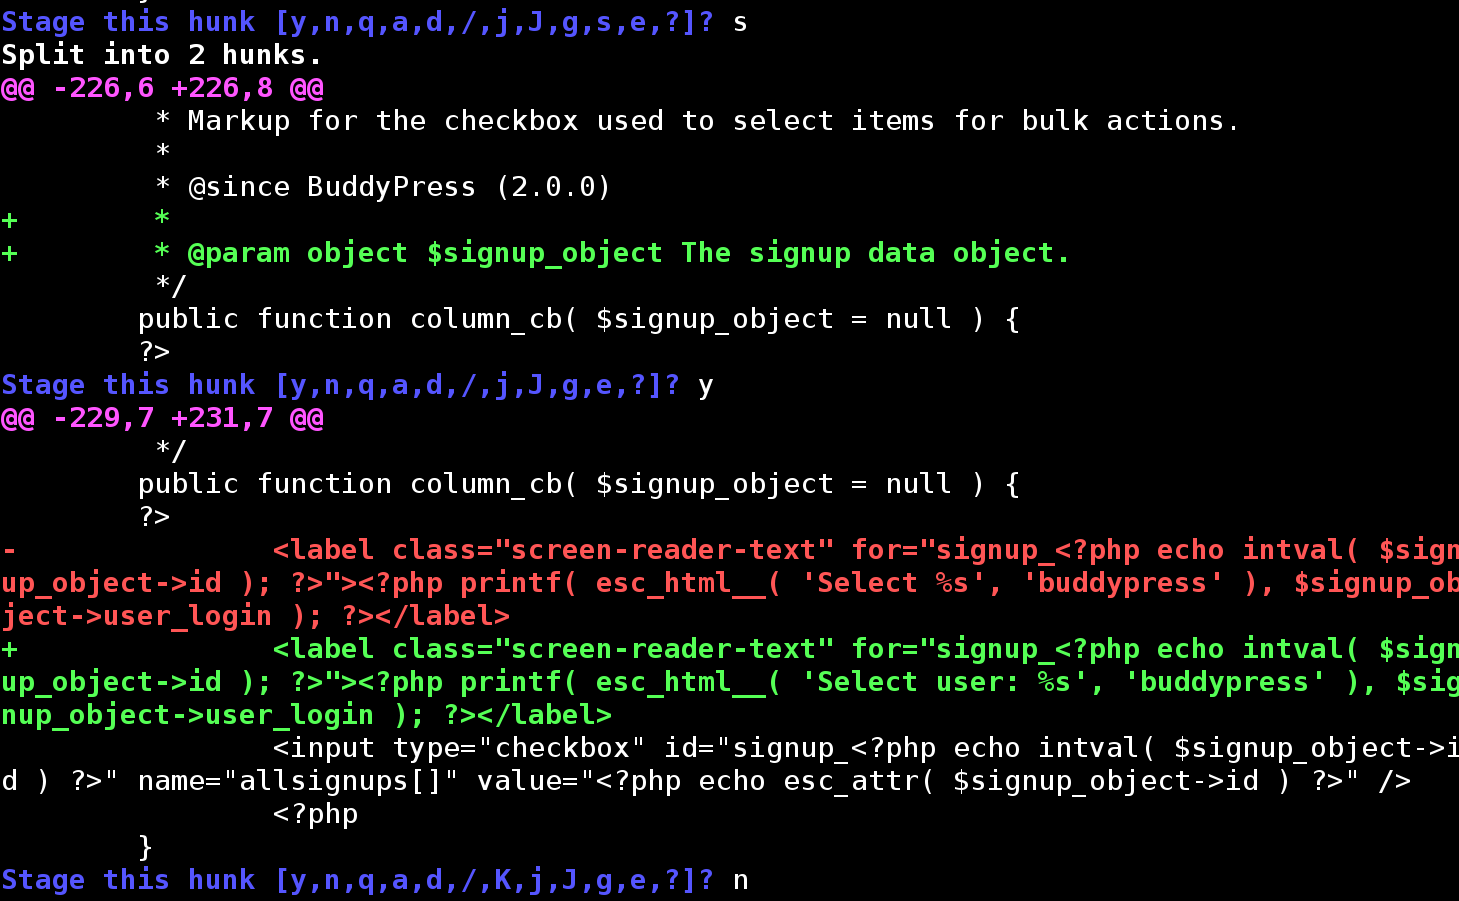
The hunk is now split into two. The first sub-hunk is the documentation fix. Let’s stage it with y. The second sub-hunk is the code fix, which we’ll skip for now with n. Rinse and repeat with the second big hunk. git status now shows the following:

is4

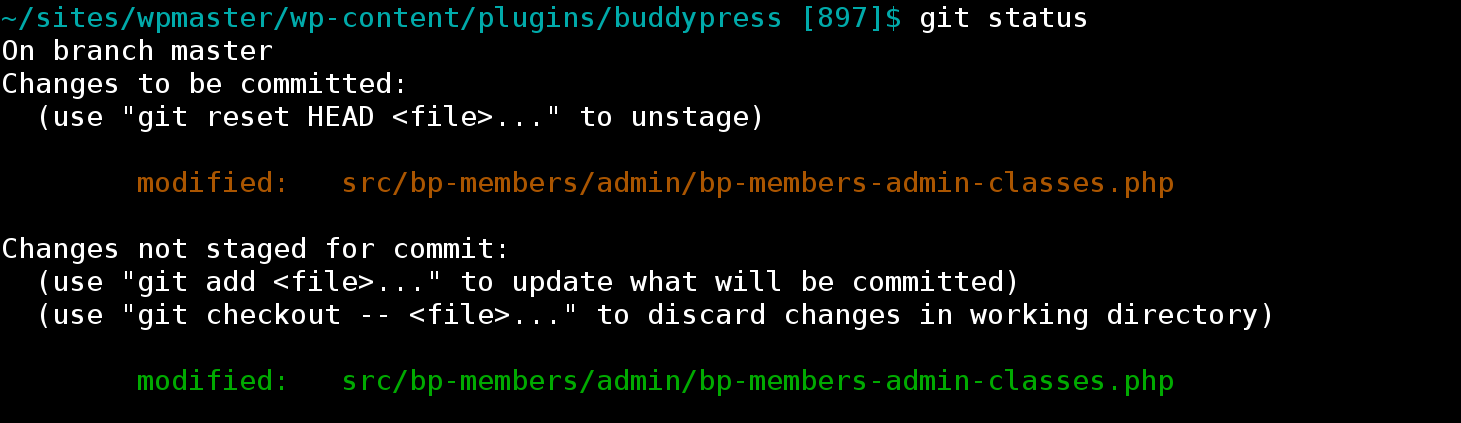
The “changes ready to be committed” are the documentation fixes. These can be viewed with git diff --cached. The “changes not staged for commit” are the code changes. These can be viewed with git diff. I’m now ready to commit the first set of changes:

is5

(I typed that commit message in my $EDITORvim – which you can’t see in this screenshot.) Then I’ll repeat the routine for the next set of changes, this time staging them all:

is6

Git’s interactive staging is relatively simple, but will completely change the way you work, in ways that will result in meaningful improvements to your projects over time. This is, IMHO, the #1 reason to use Git, and if you’re not using it – because you’re an SVN user, because you didn’t know about it, because your GUI client doesn’t support it – it’s important enough that you ought to think about changing your toolkit.

Recommendations for per-project time tracking tools

I don’t bill by the hour very much anymore, but I still like to keep rough track of time spent on individual client projects, for my own purposes. I currently use a simple spreadsheet, with tabs for each project/client. Yesterday I asked on Twitter what tools people were using for this purpose:

Here are some responses I got. I can’t personally endorse anything on this list, but it might be a helpful starting point for others.

Using a hosts file for easy management of dev, staging, and production WordPress sites

This recent article at Smashing Magazine discussed trends and challenges in deploying WordPress sites. The biggest issue cited by the article and the lengthy comments that follow is the issue of the database: because WordPress stores strings in the database that contain the site domain (including configuration options and asset paths), it’s hard to migrate content and config between dev, staging, and production environments. A bunch of possible solutions were offered up, including interconnectit/Search-Replace-DB, which I use fairly often and really like.

I was surprised, however, that no one talked about my preferred strategy, which is, in a way, the simplest: Dev, staging, and production should all have the same domain names. When you remove the need to change the domain, you make it much easier to deploy specific pieces of content, spin up new instances, etc.

Since all versions of a site have the same domain name – say, booneisthebomb.com – I use my local hosts file (/etc/hosts on *nix systems) to switch between instances. So I may have the following lines in /etc/hosts:

[code]
# Local development
# 127.0.0.1 booneisthebomb.com

# Staging site
# 123.456.789.0 booneisthebomb.com
[/code]

With these two lines commented out, going to booneisthebomb.com in a browser will use DNS for the lookup, which is to say it’ll go to the production site. Uncommenting one of the lines allows me to work on the local or staging site.

The biggest pitfall of this technique is that now there is no obvious way to tell your environments apart (and you definitely don’t want to mistake your production site for a dev site). My solution for this is to drop this file into wp-content/mu-plugins/. Then, in my environment file (which contains env-specific config, such as database connection info), I put a line like this:

[code language=”php”]
define( ‘ENV_TYPE’, ‘staging’ );
[/code]

Now, when I load up the staging site, it shows booneisthebomb.com in the URL bar, and the following box appears at the bottom of every page:

env-type-flag

Make Github issue numbers appear in browser tabs

#70. Yippee!

#70. Yippee!

I use Github Issues as a bugtracker for a number of my projects. My workflow usually includes having the ticket open in one browser tab, and a local WordPress installation open in another browser tab (to test the bugfixes themselves). When I write commit messages, I want to reference the issue number, but by default, it’s buried deep in the <title> element, and thus not visible on a smallish browser tab.

So I wrote a short userscript that reproduces the issue number at the beginning of the <title>, so I can see it at a glance. It’s structured as a userscript for Greasemonkey/Firefox, though I imagine you could easily repackage it for Chrome or whatever.

[code language=javascript]
// ==UserScript==
// @name github issue number in tab
// @namespace https://boone.gorg.es
// @description github issue number in tab
// @include https://github.com/*/*/issues/*
// @version 1
// @grant none
// ==/UserScript==

var t, ttext, issueno;

t = document.getElementsByTagName( ‘title’ );
ttext = t[0].innerHTML;
ino = ttext.match(/Issue #([0-9]+)/);
console.log(“#” + ino[1] + ” ” + ttext);
t[0].innerHTML = “#” + ino[1] + ” ” + ttext;
[/code]