Git is an excellent tool for collaborative software development in a number of ways. In my opinion, Git’s most valuable feature – which also happens to be one of its most underappreciated – is interactive staging: git add -i and git add -p. If you are a software development who does not use Git, or if you use Git but do not use this feature, you should not write another line of code until you learn it.
When working on a large project, there is no principle more important than that changesets are atomic. Combining more than one distinct change into a commit is highly detrimental to a project’s history. Muddled changesets are hell for future developers on the project, including Future You. The usefulness of log, blame, bisect, and (not to get hyperbolic or anything) version control itself, depends on commits being logically small units.
But, of course, software is not built linearly. You’re writing cool new feature X, but you notice that in order to complete X, you need to fix bug Y. The problem is that you’re already halfway finished with X. You could: generate a diff file, stash/reset your changes, fix Y, commit the fix to Y, reapply the X diff, and continue work on X. This is a pain. Or you could: commit a large changeset that contains X and Y. But this is lousy for the reasons described above. Ideally, you would be able to fix Y, continue with X, and then sort out the changesets just before commit.
This is what Git’s interactive staging lets you do. Start with a clean index. Begin hacking on X. Stumble on Y. Fix Y. Complete X. Then use Git’s stage to commit Y and X separately.
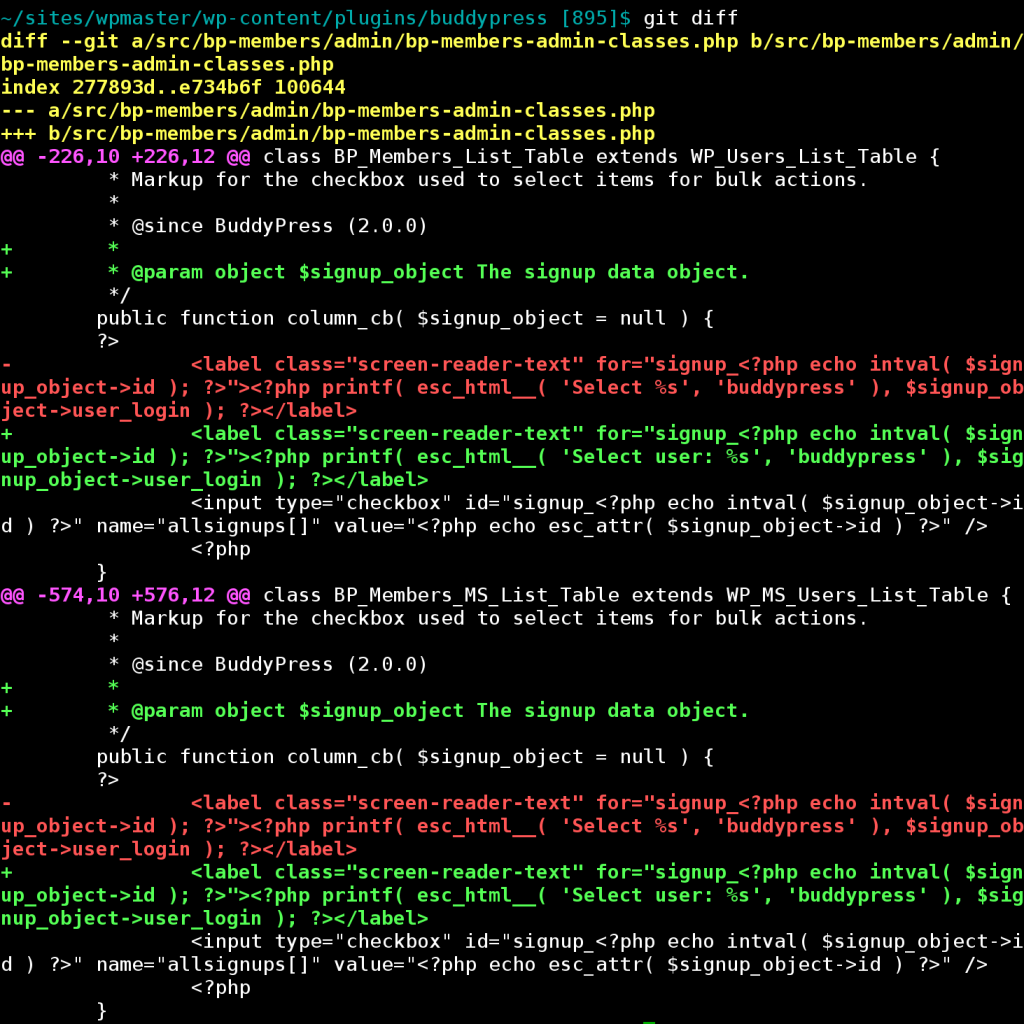
Here’s a real example. (What follows is a pretty basic situation. git add -p is a subset of git add -i, which is full of whiz-bang goodies.) Say I’m working on fixing some poor localization in BuddyPress. While doing so, I notice that some PHPDoc is missing. So I fix both issues, and git diff shows the following:
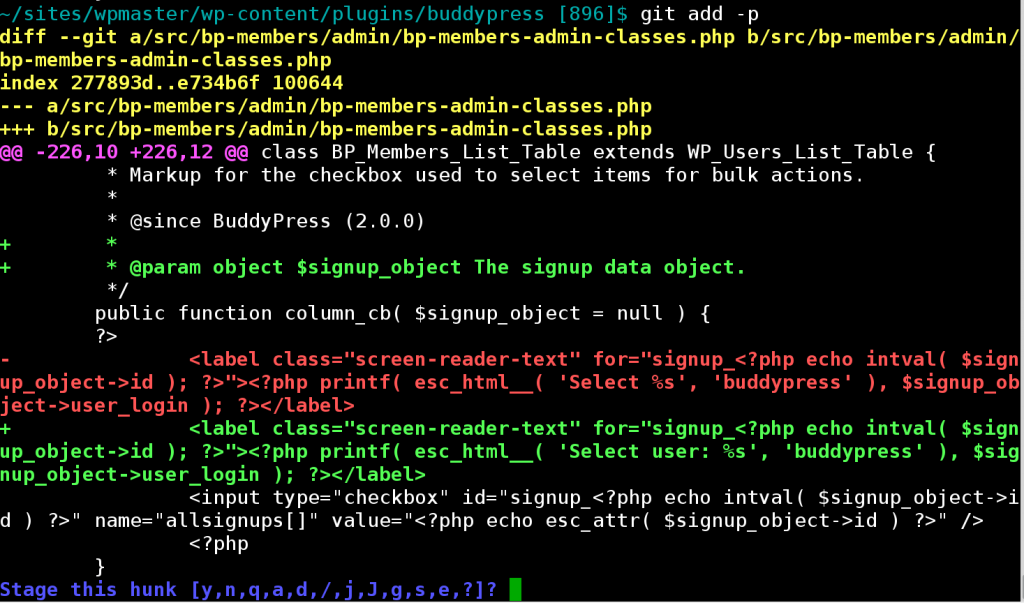
Now, I know that Changesets Should Be Atomic, so I want to commit the documentation changes separately from the bug fix. So, instead of git commit -a or git add . – which blindly stage all changes – I jump into patch mode with git add -p:
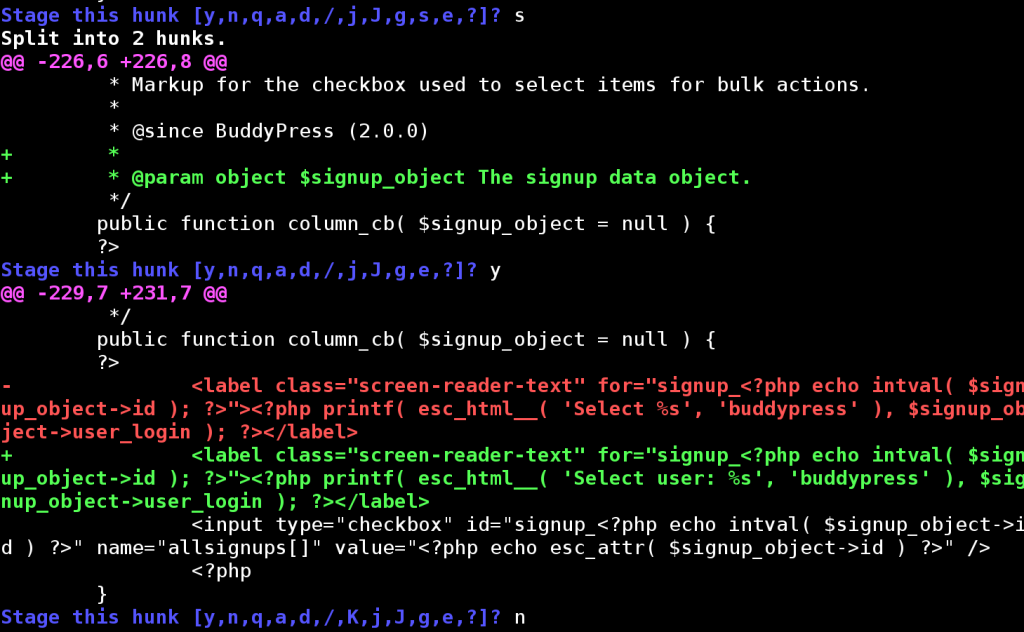
Git has determined what it considers to be the first “hunk” of changes. (Hunks: it takes one to know one.) I’m then asked whether I want to “Stage this hunk”. Normally I’ll just type y or n, but in this case I see that Git hasn’t made the hunks small enough, so I choose s, for “split”:
The hunk is now split into two. The first sub-hunk is the documentation fix. Let’s stage it with y. The second sub-hunk is the code fix, which we’ll skip for now with n. Rinse and repeat with the second big hunk. git status now shows the following:
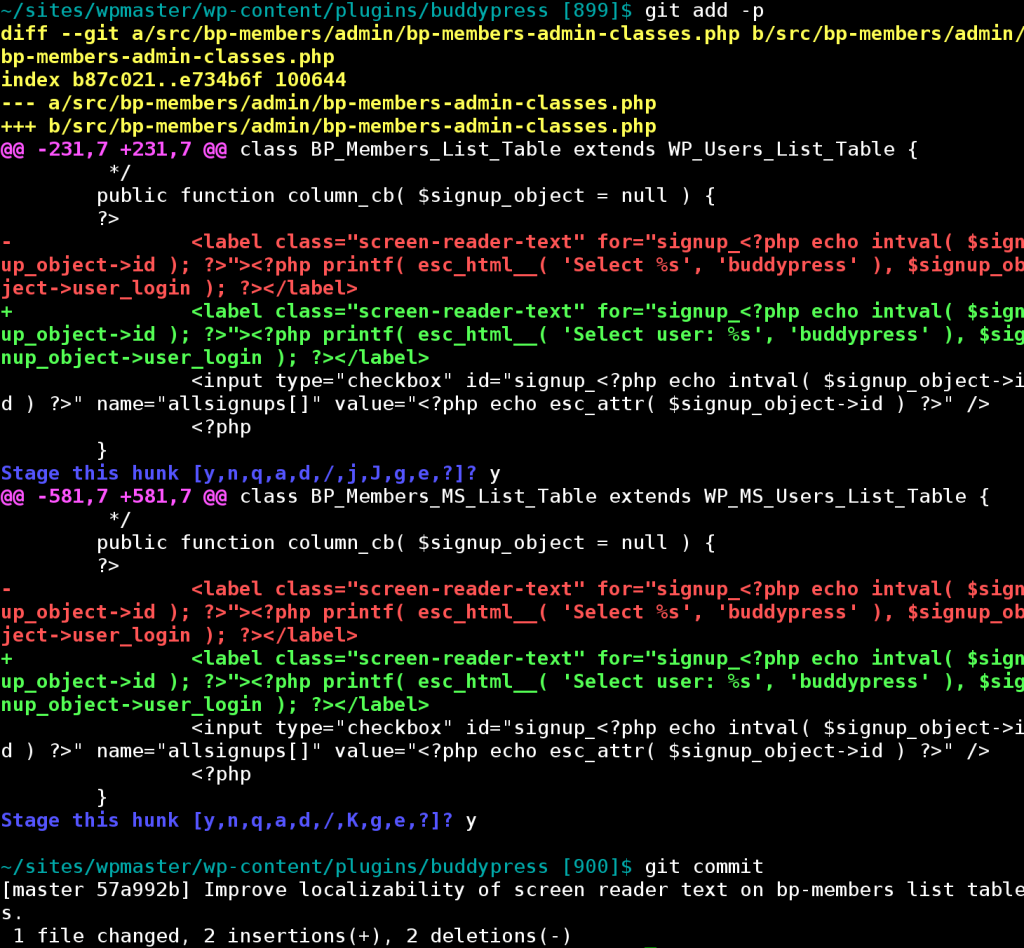
The “changes ready to be committed” are the documentation fixes. These can be viewed with git diff --cached. The “changes not staged for commit” are the code changes. These can be viewed with git diff. I’m now ready to commit the first set of changes:
(I typed that commit message in my $EDITOR – vim – which you can’t see in this screenshot.) Then I’ll repeat the routine for the next set of changes, this time staging them all:
Git’s interactive staging is relatively simple, but will completely change the way you work, in ways that will result in meaningful improvements to your projects over time. This is, IMHO, the #1 reason to use Git, and if you’re not using it – because you’re an SVN user, because you didn’t know about it, because your GUI client doesn’t support it – it’s important enough that you ought to think about changing your toolkit.
